Introduction
Cloudpress allows you to export Notion pages to any of our supported Content Management Systems (CMS). Cloudpress will export your content while preserving your formatting, uploading your images, converting links social media posts to the proper embeds, and much more. This document walks you through the basic steps of exporting Notion pages to your CMS using the Cloudpress application.Export your Notion pages
1
Select Job type
Navigate to the New Job page and
click the Export Notion Pages to your CMS 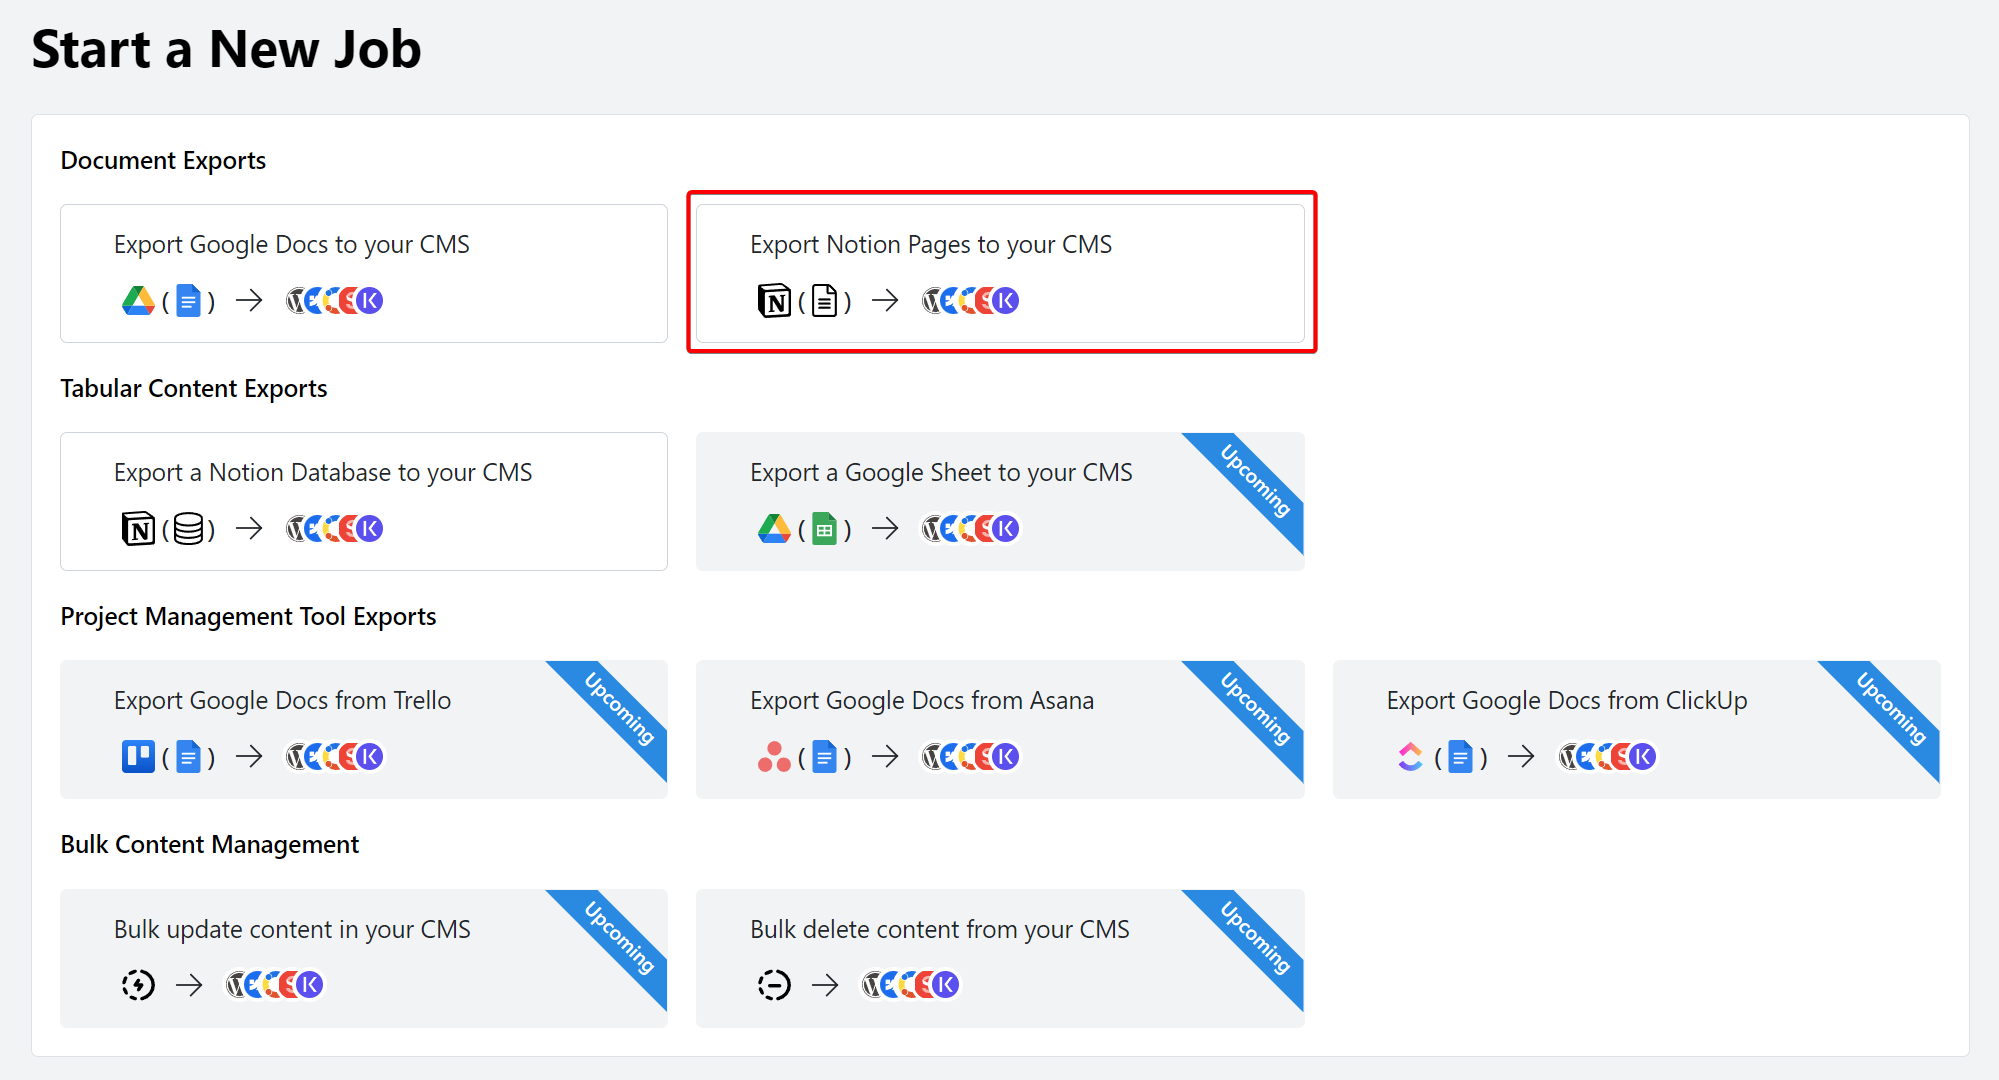
2
Select Notion connection
Select the Notion Connection you want to export from. If you have not
previously connected a Notion account, you can do so by clicking the
Connect Account button. 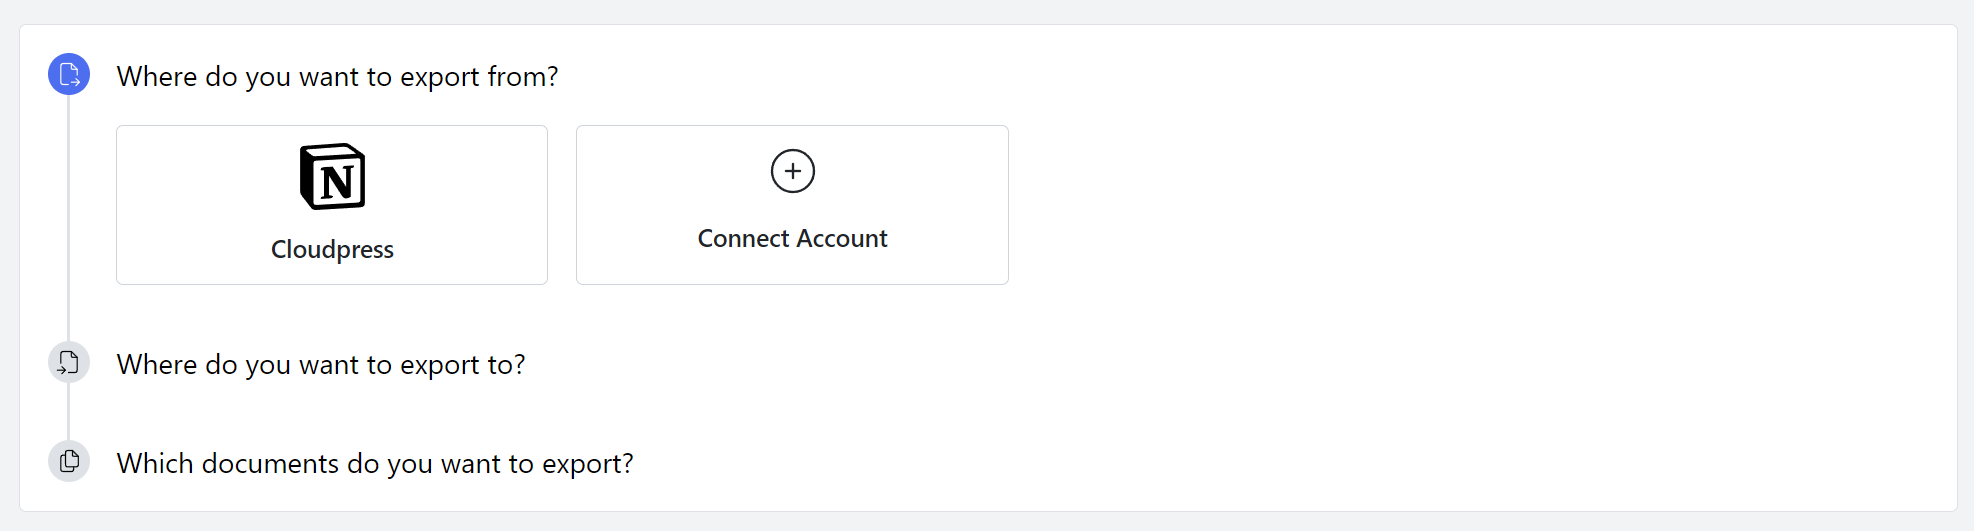
3
Select CMS connection
Select the CMS you want to export the content to. If you have not previously
connected a CMS, you can do so by clicking the Connect Account
button.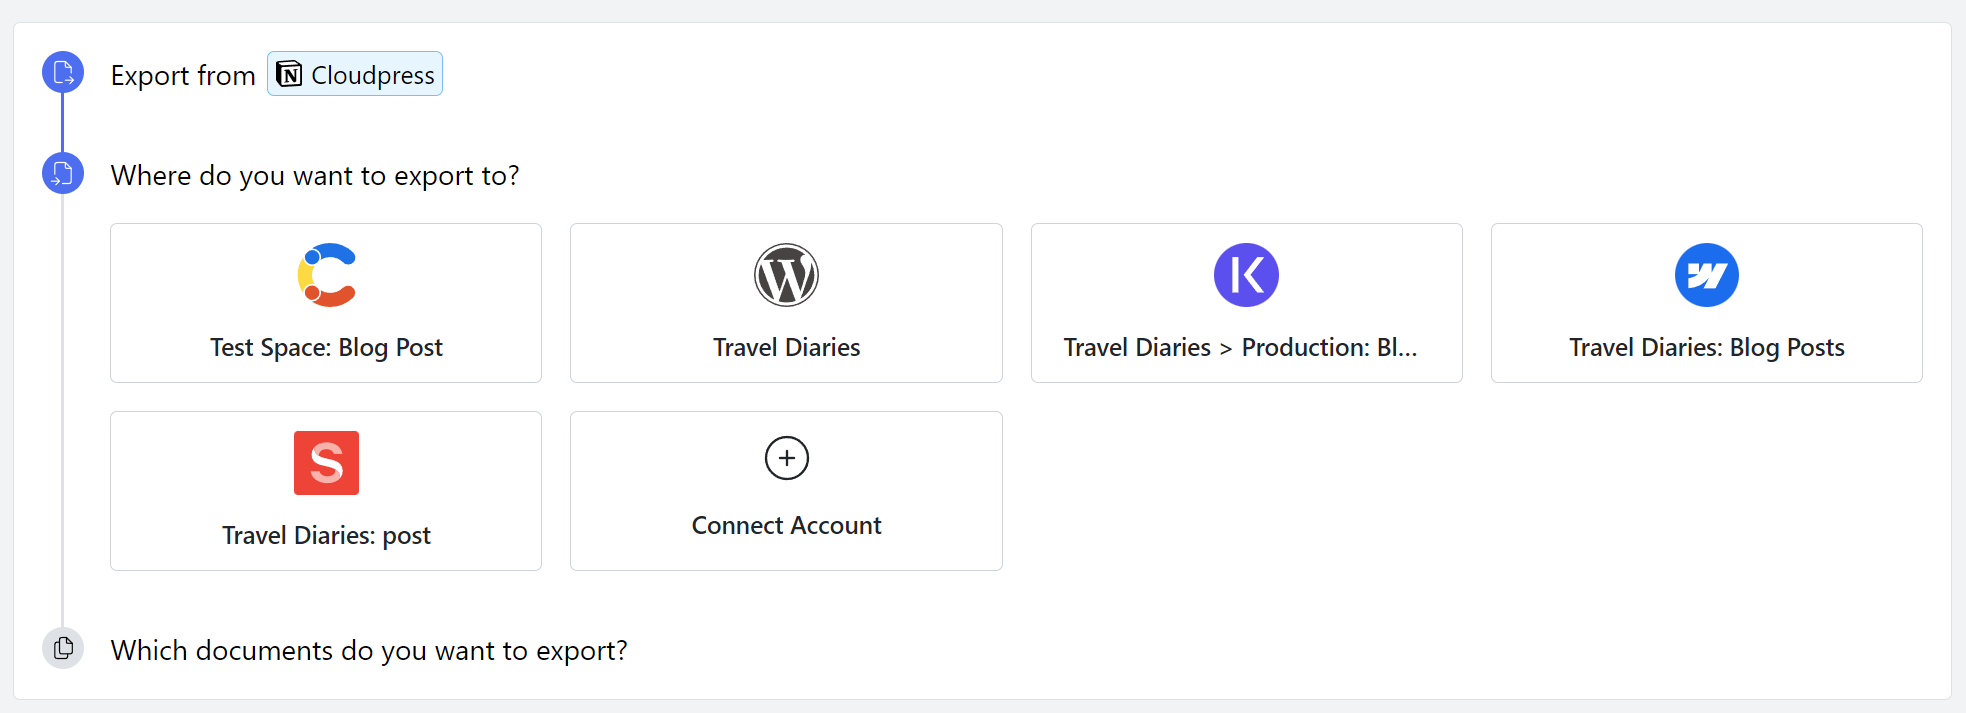
4
Select Notion pages
Select the Notion pages you wish to export by clicking the Select
documents button.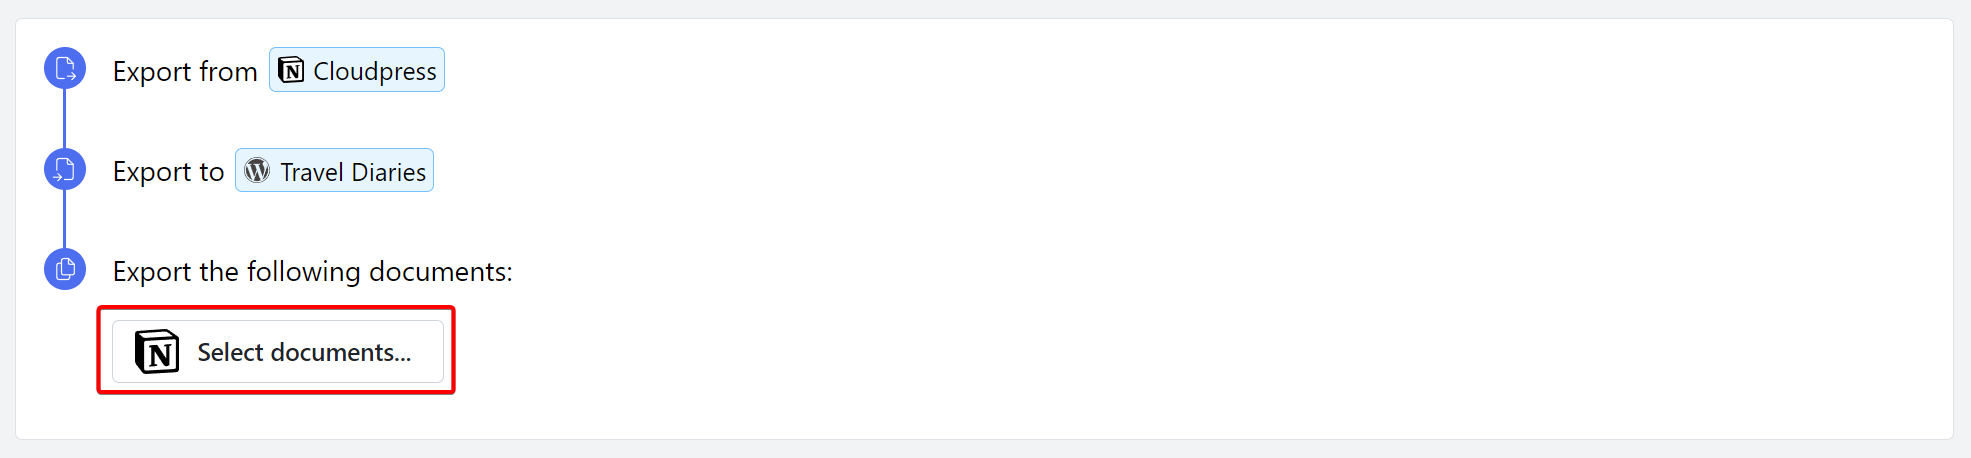 You
can search for the documents you want to export using the search box at the
top. Select the checkbox next to the document(s) you want to export and
click the Select button.
You
can search for the documents you want to export using the search box at the
top. Select the checkbox next to the document(s) you want to export and
click the Select button. 
Notion permissions may take a while to take effect. If you created a new
Notion Connection during step 2, it may a few minutes before the pages
are visible to Cloudpress.
You
can search for the documents you want to export using the search box at the
top. Select the checkbox next to the document(s) you want to export and
click the Select button. 5
Export pages
Once you have selected all the pages you want to export, click the
Export button.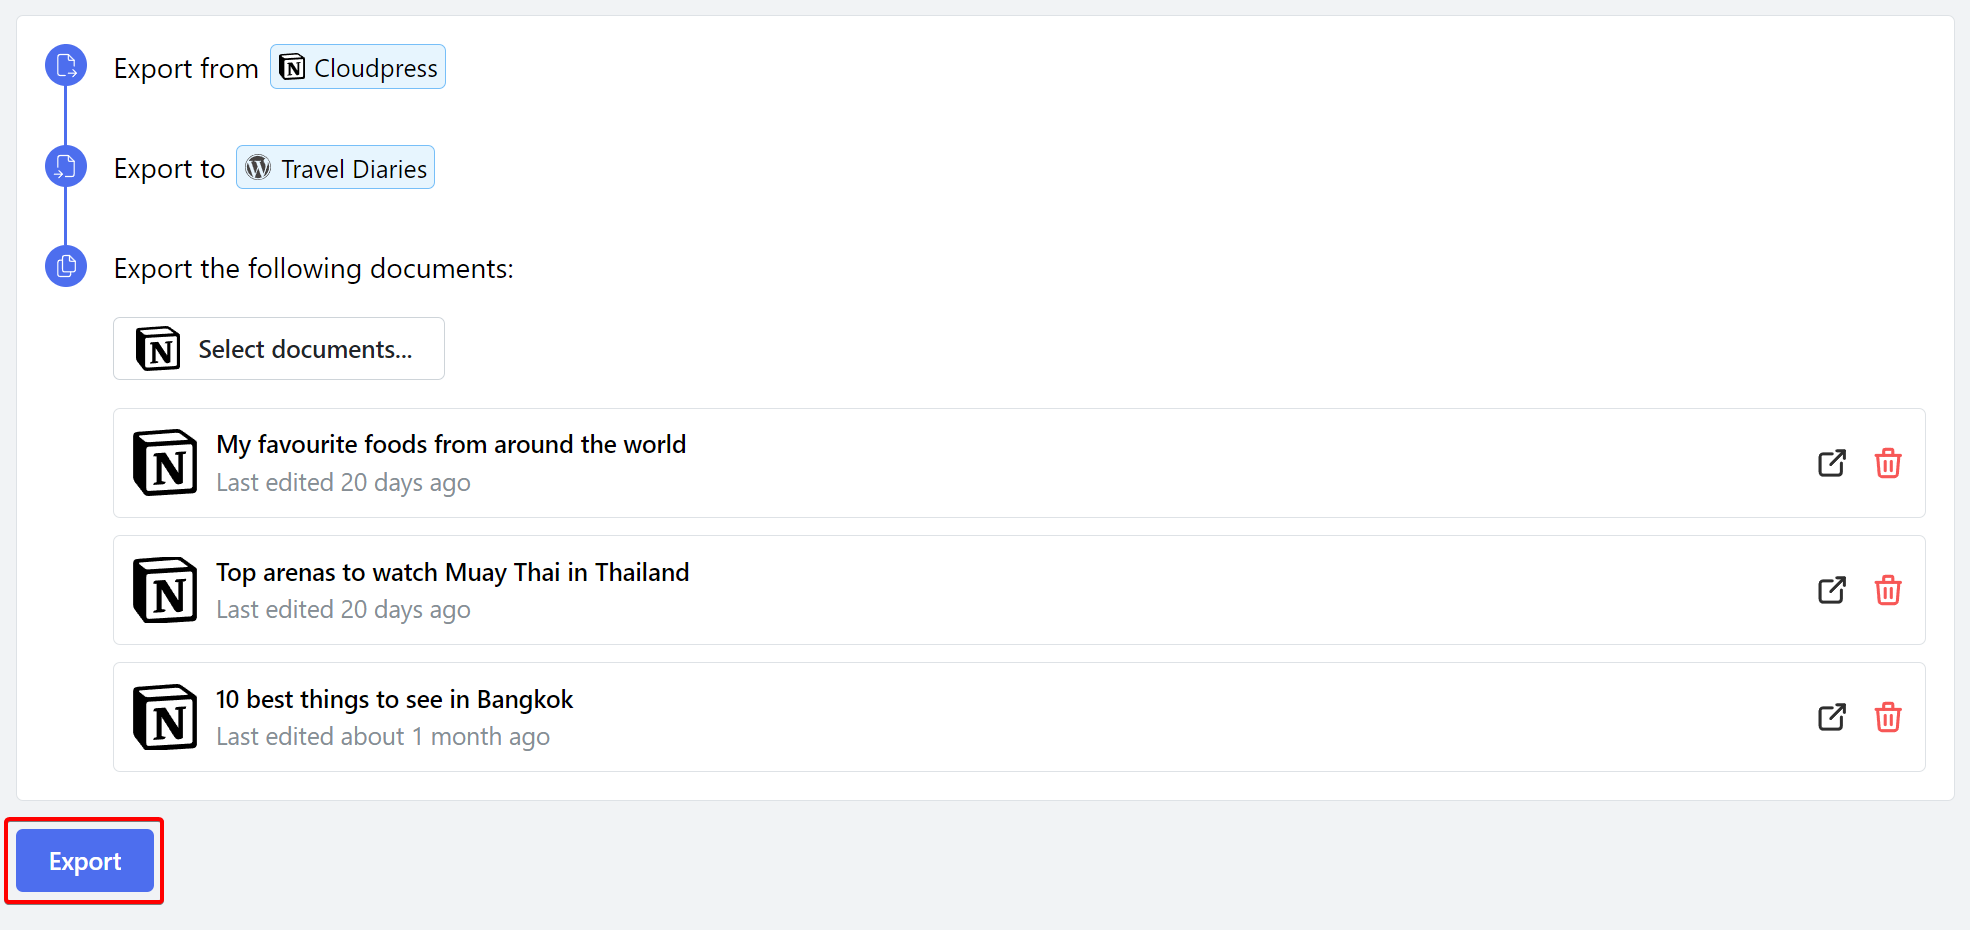 Cloudpress will
display a progress indicator while exporting the content. Once the export is
complete, you can view the details of the export by clicking the View Job
Detail button.
Cloudpress will
display a progress indicator while exporting the content. Once the export is
complete, you can view the details of the export by clicking the View Job
Detail button.
Cloudpress will
display a progress indicator while exporting the content. Once the export is
complete, you can view the details of the export by clicking the View Job
Detail button.