Introduction
Cloudpress allows you to set additional field values when exporting content from Google Docs by using something we refer to as a property table. This property table allows you to specify additional properties for the document that are then mapped to fields in your Content Management System (CMS).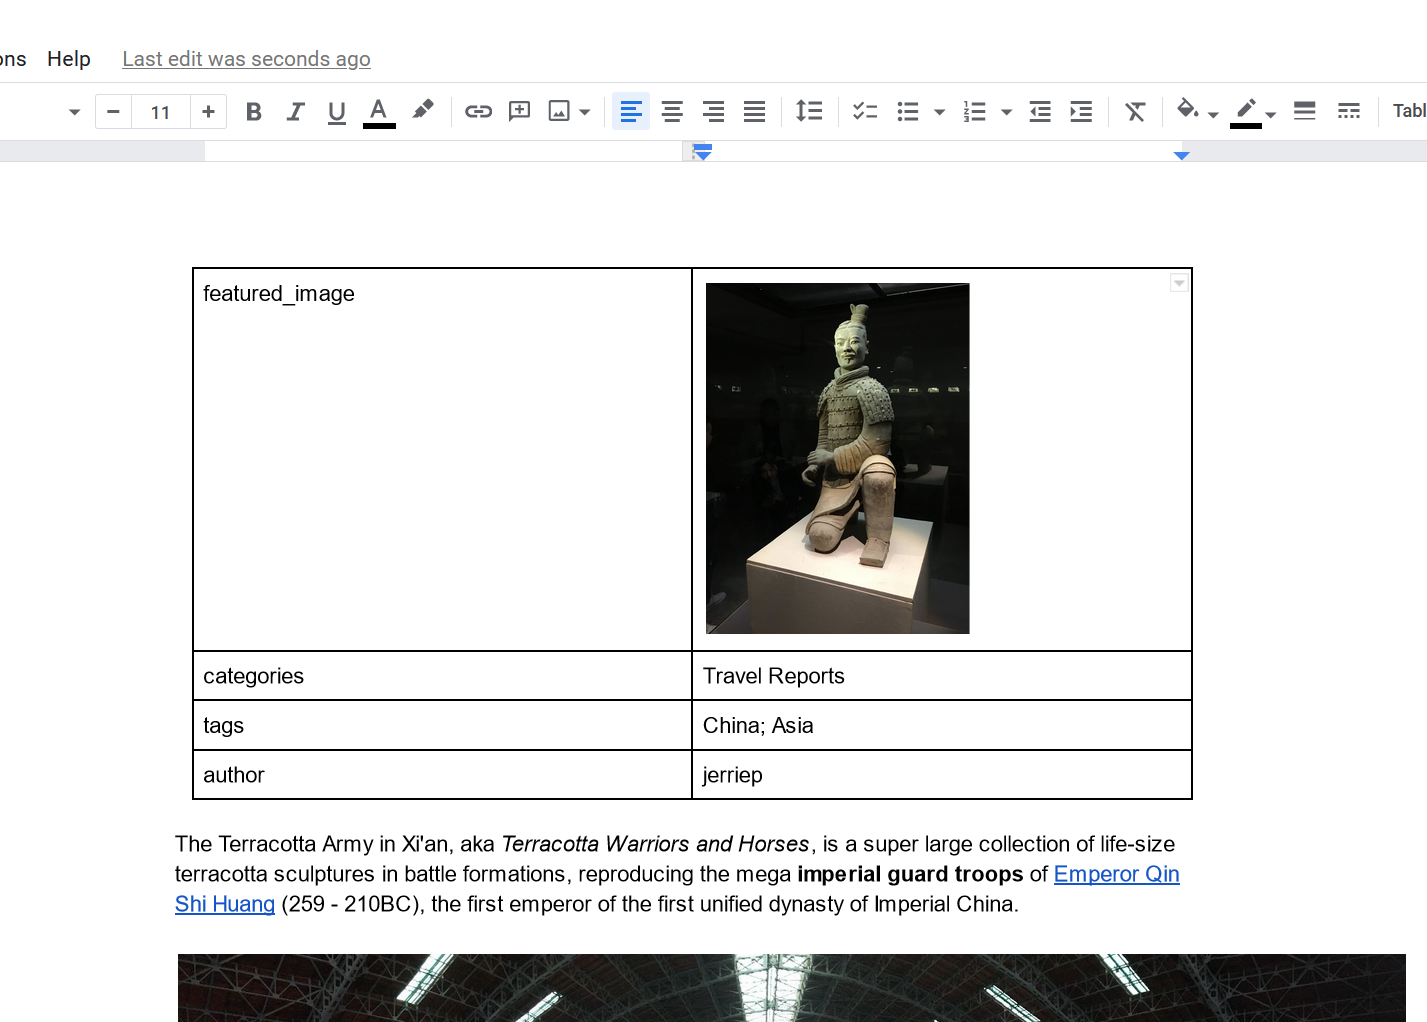
Requirements
This property table has a few requirements:- The property table must be at the top of the Google Doc before any other content.
- The property table must have exactly two columns.
- The first column will be the name of the property and must match the name of a field in your CMS.
- The second column will contain the property’s value and must contain a single line of text or image.
Configuring Cloudpress to use the property table
Configuring Cloudpress to use the property table depends on whether you are exporting content with the add-on, or the Cloudpress application.Using the Google Docs add-on
Using the Google Docs add-on
When using the Google Docs Add-on to export content, you must be sure to enable the property table. Open the Google Docs Add-on in the editor and click on the menu in the top right corner. Click on the Settings option.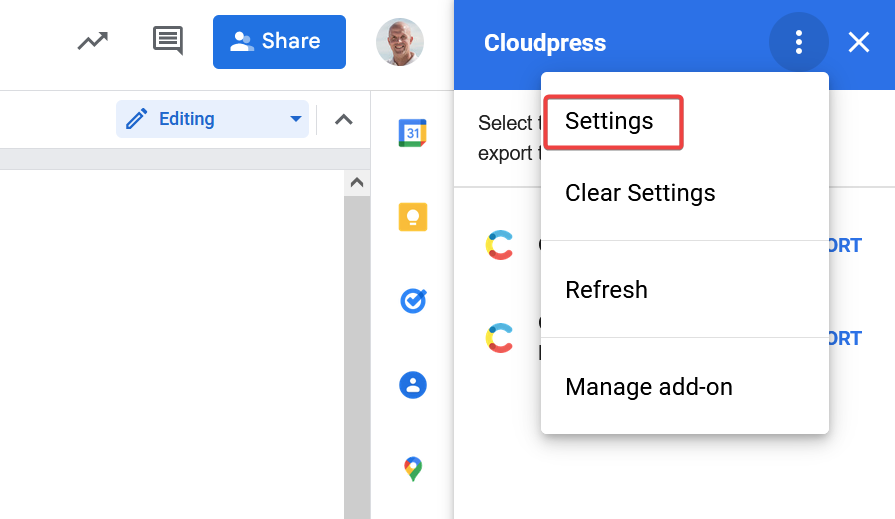 Enable the Use property table option, then click Save.
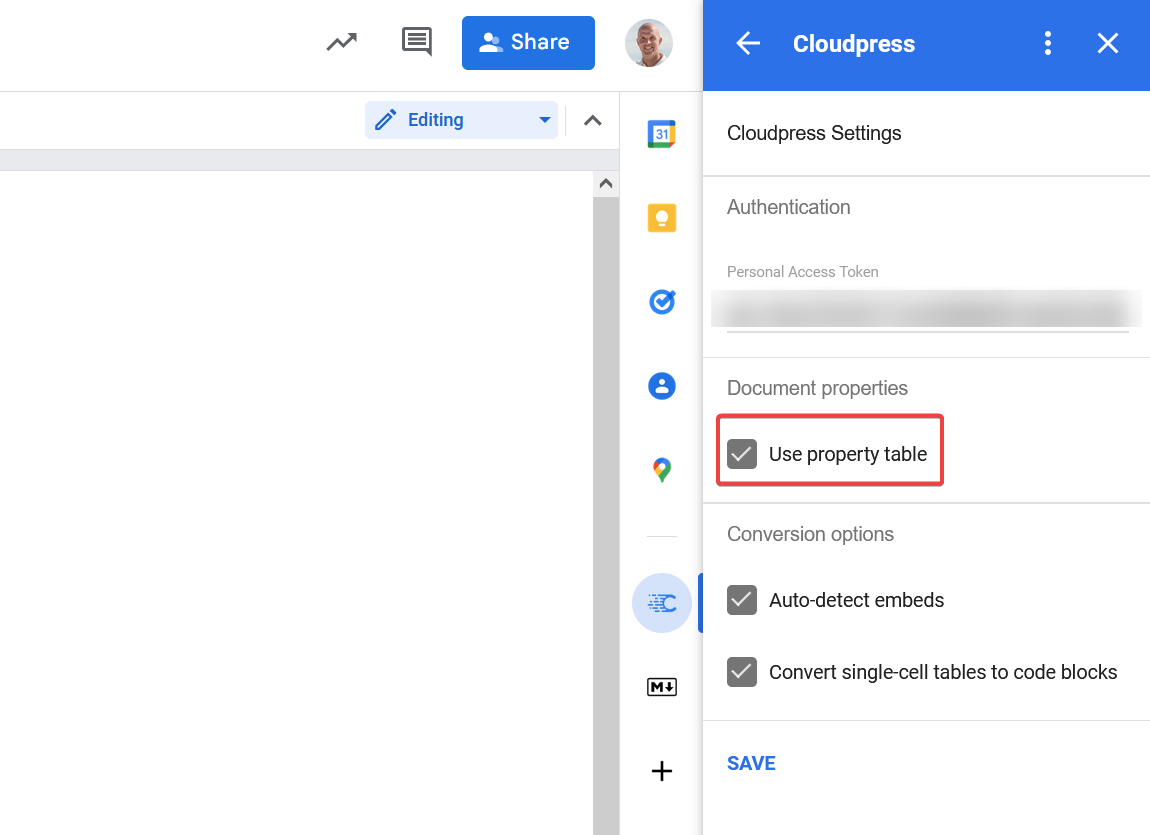
 Enable the Use property table option, then click Save.
Using the Cloudpress application
Using the Cloudpress application
If you export content using the Cloudpress application, you need to configure the Google Drive connection you are using to make use of a property table.Go the the Connections page in Cloudpress and select the Google Drive connection you are using.Navigate to the Content Conversion tab and enable the “Use property table” option. Click Save Changes.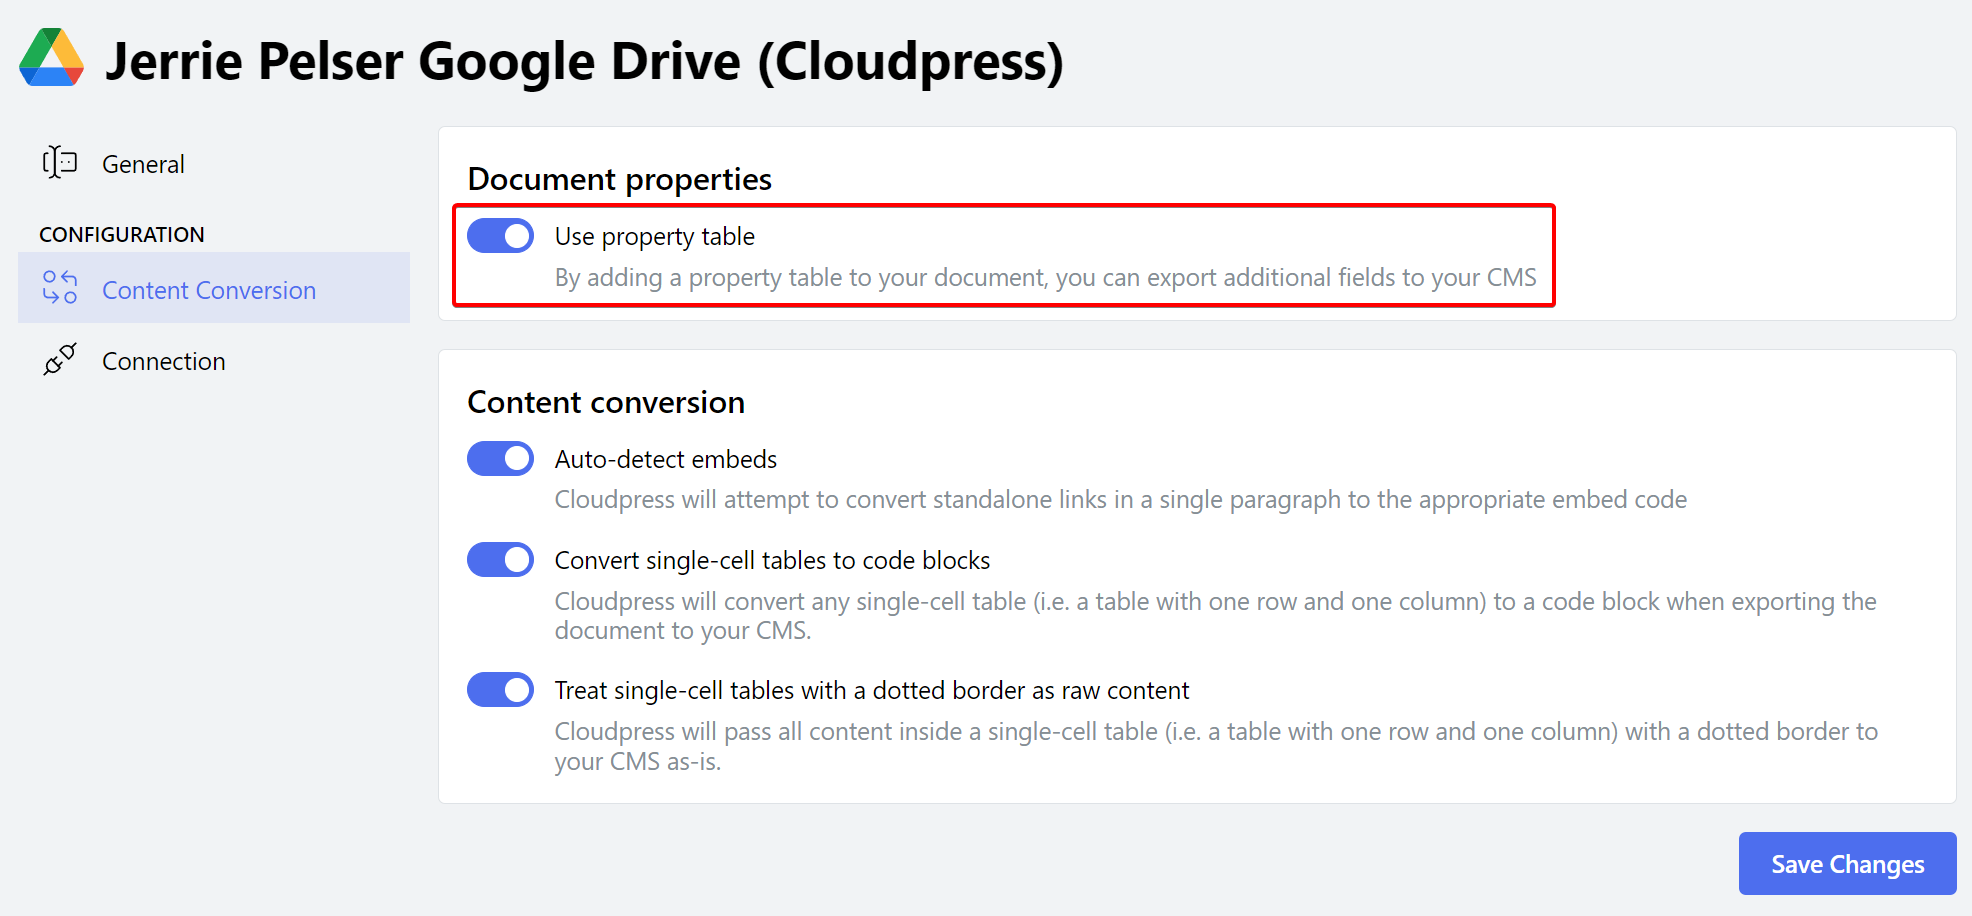

Allowed property names
The property name must match the name of an available field in your underlying CMS. The available fields will differ between the various CMSs. For a CMS such as WordPress, a fixed number of allowed field names are available. A CMS such as Webflow enables you to define custom fields, and the field names will therefore depend on your implementation. You can refer to the relevant section for each of the CMSs listed below for more information.- Set additional field values in WordPress
- Set additional field values in Contentful
- Set additional field values in Webflow
- Set additional field values in Sanity
- Set additional field values in Kontent.ai
Allowed property values
As mentioned earlier, the value of a property must be one of the following:- A single line of text
- A single image
featured_image field in WordPress, the value must be an image, as in the example screenshot at the top of this page. All other field values must be specified as a text value, and Cloudpress will try its best to convert that to the correct value for the field.
In cases where the field can accept a list of items, such as the categories field in WordPress, you can delimit items with a semi-colon (;). Once again, you can refer to the screenshot at the top of this page for an example.
Errors when setting field values
If Cloudpress cannot set a field value, it will still export the document, but it will indicate that the export job has warnings. You will see a warning label on the Job History page. Clicking on the job will take you to the Job Detail page, where you can refer to the Log for more information about the warnings.
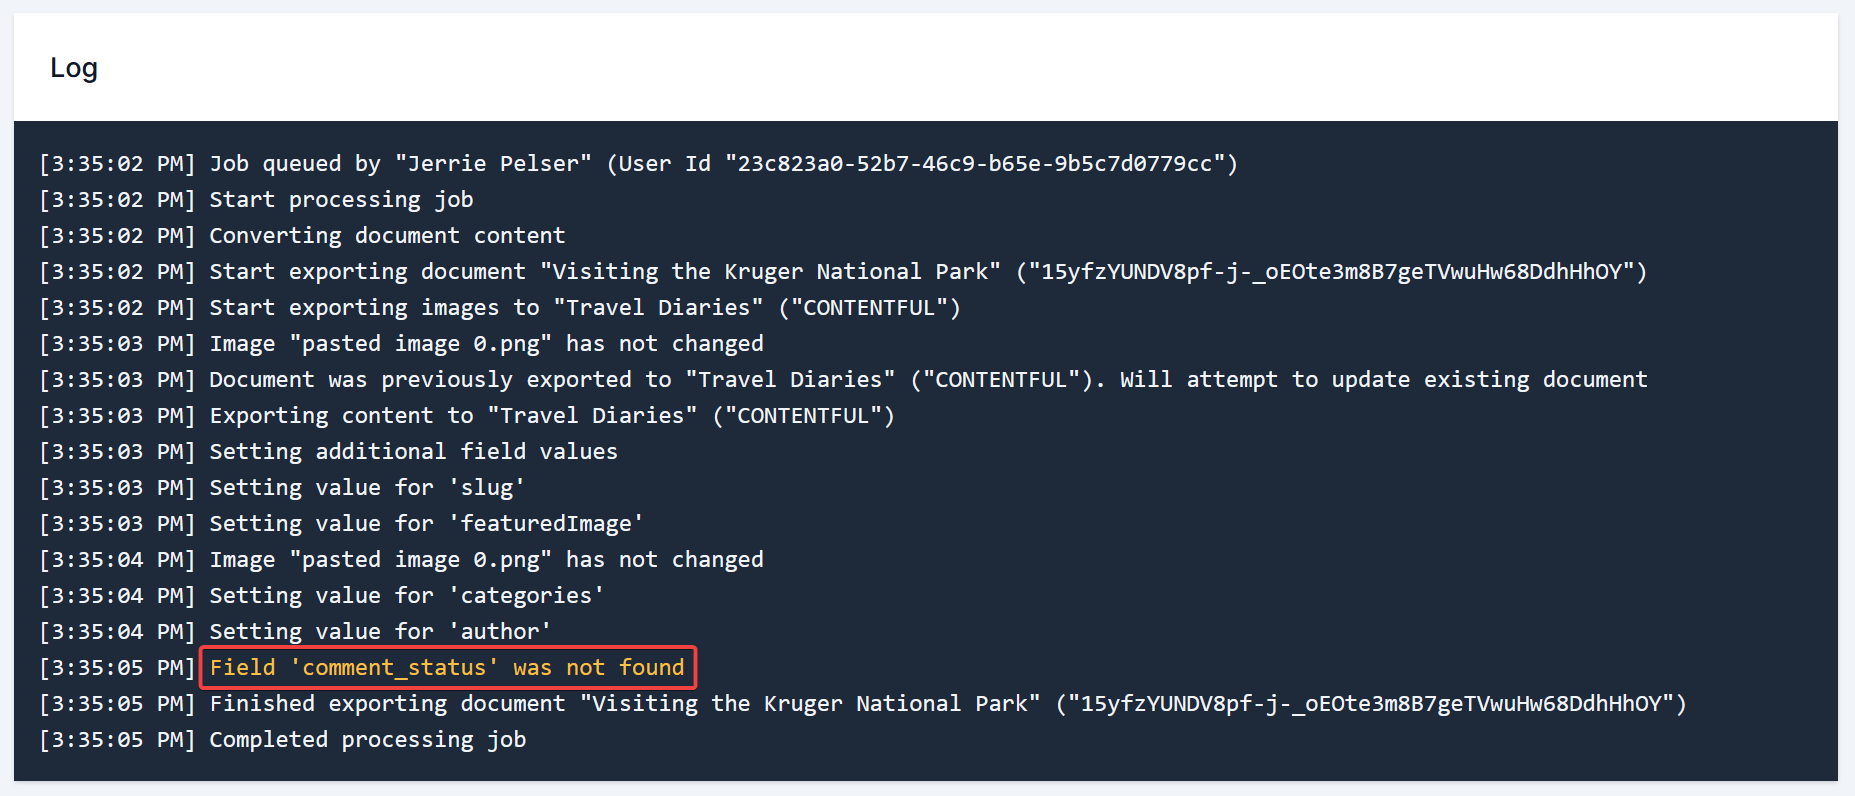
Wrong field name
If the property name does not match a field in your CMS, Cloudpress will give the following warning:Field '<fieldname>' was not found
The resolve this problem, make sure that the property name matches a field in your CMS. You can refer to the documentation for your CMS in the Integrations section of the documentation for more information.
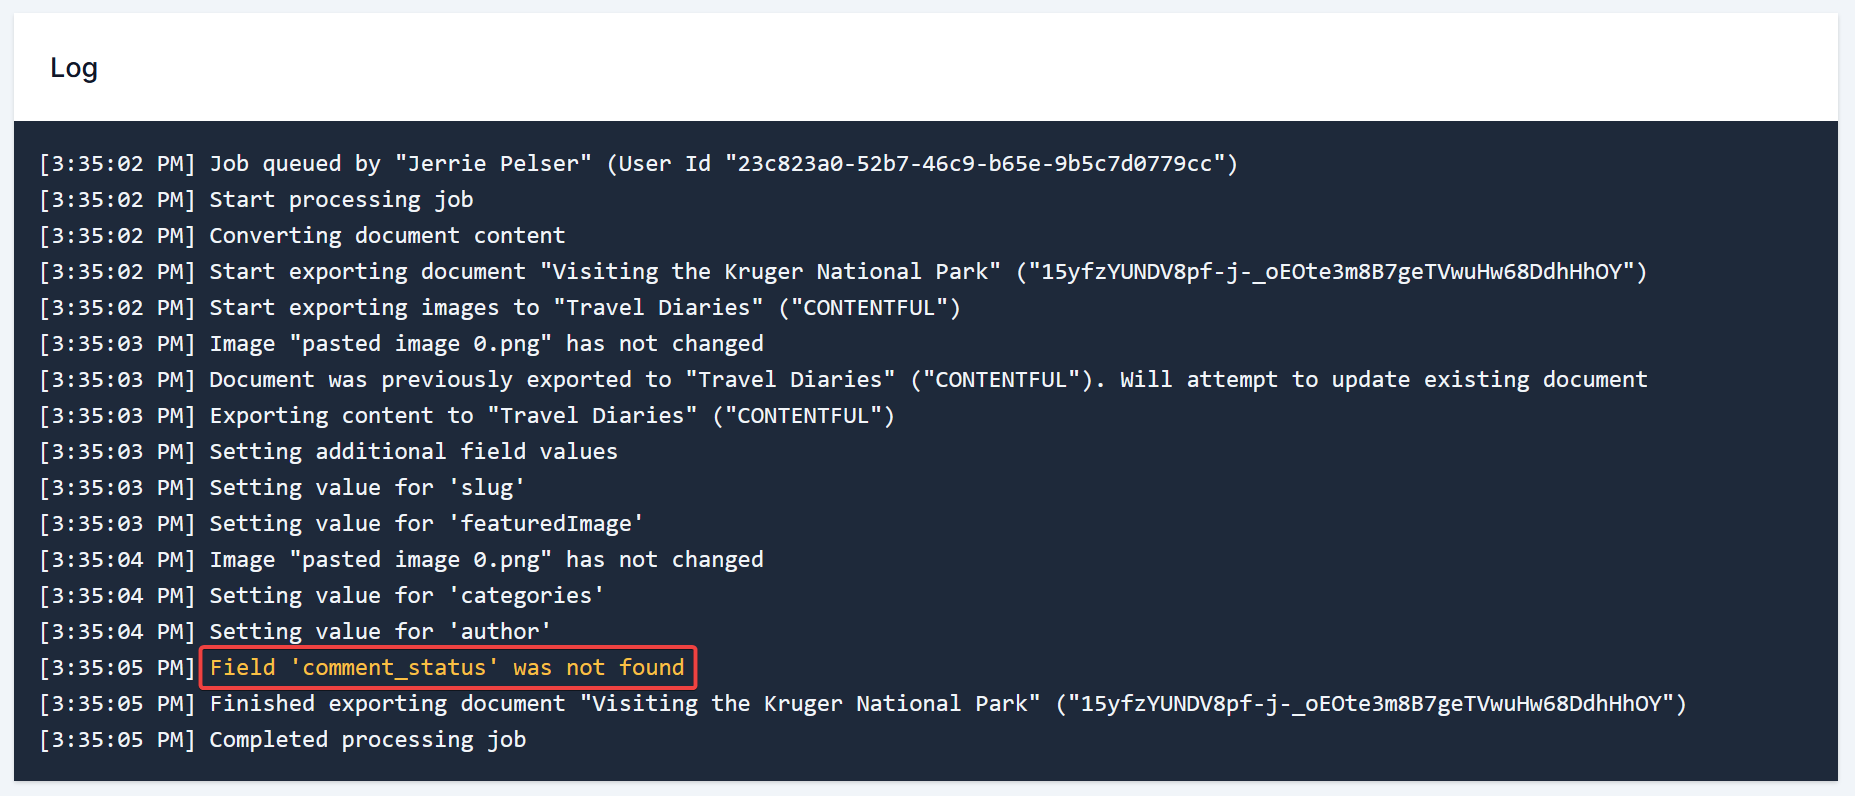
Wrong field type
If the value you specified in the property value column is incompatible with the type of field in your CMS, Cloudpress will give the following warning:The value supplied for the '<fieldname>' field is incompatible with the field type
This can happen, for example, when the field is expecting text, but you specify an image in the property value column. The resolve this problem, make sure that the value you supply is compatible with the type of field in your CMS.
You can refer to the documentation for your CMS in the Integrations section of the documentation for more information.
Wrong lookup value
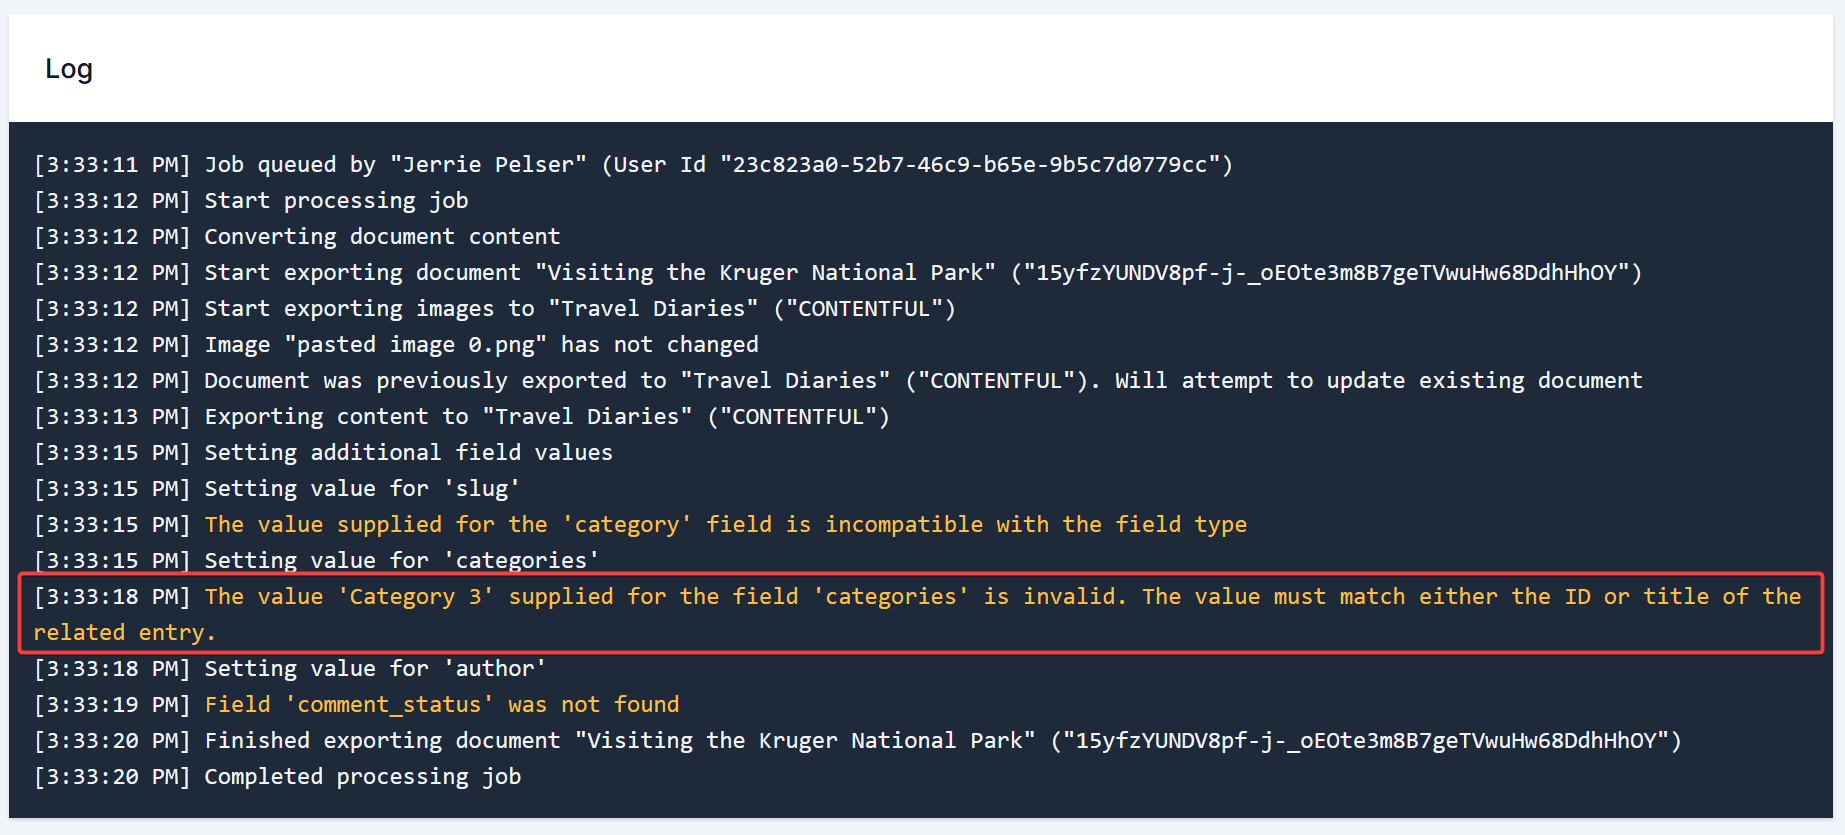
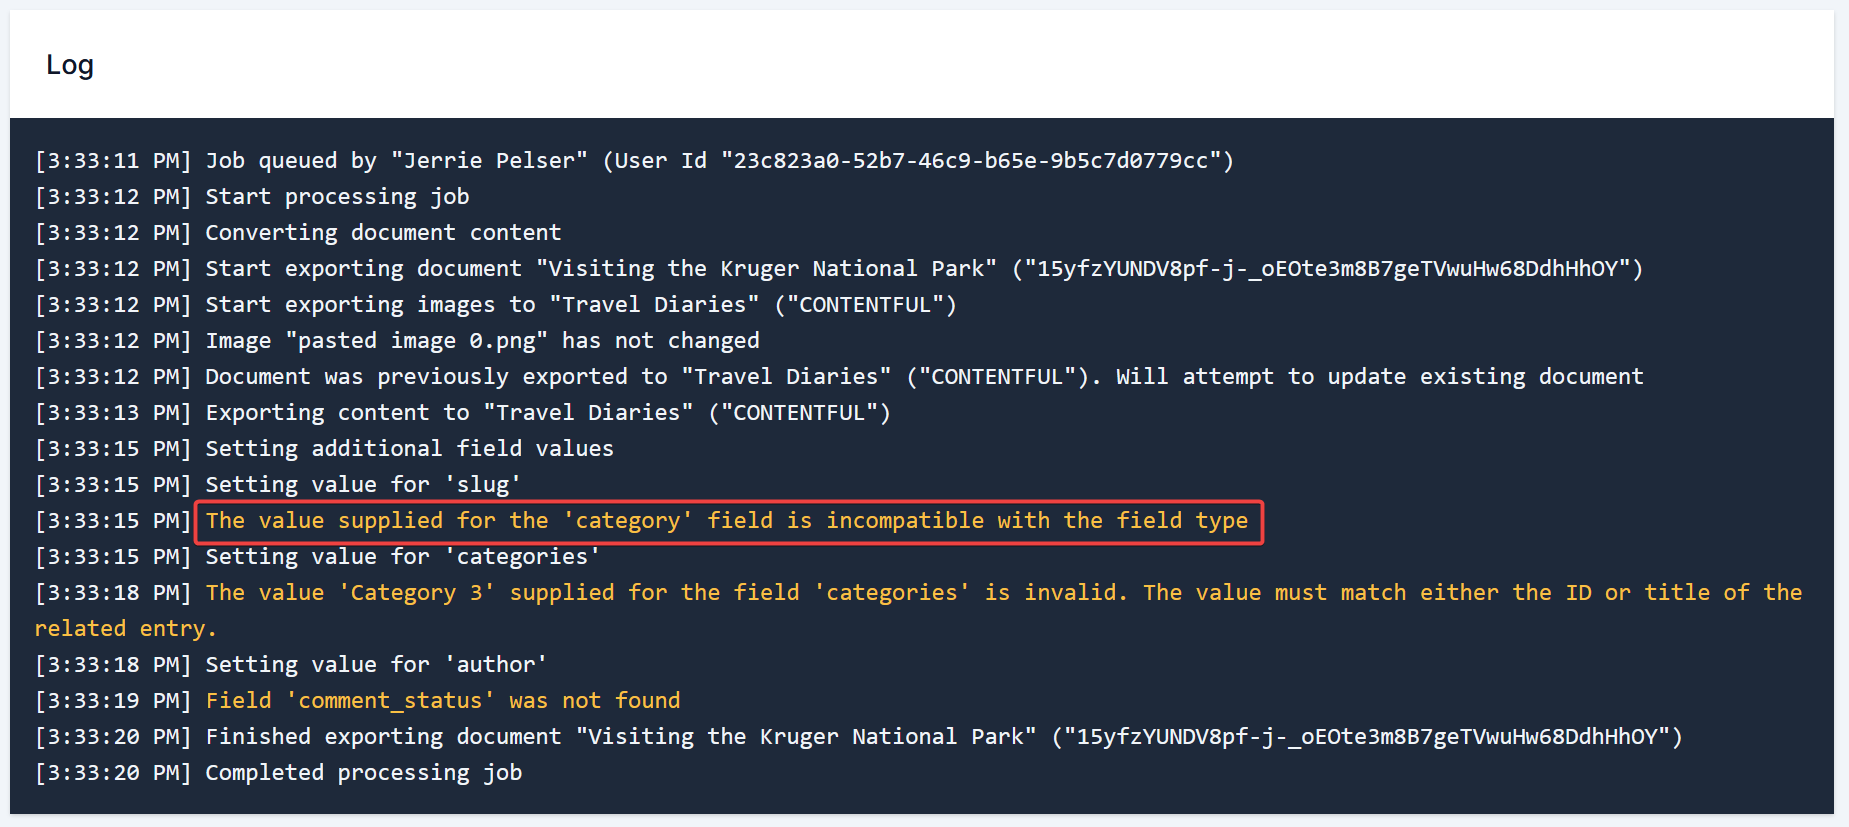
When the field you are trying to update in your CMS is a lookup field, and the value you specified does not exist, Cloudpress will give the following warning:The value '<value>' supplied for the field '<fieldname>' is invalid. <explanation>.
The screenshot below gives an example of this. In this case, the user tried to set the value for the categories field in WordPress, but no category with the name or ID “Category 3” exists. Cloudpress try and give an explanation for the error and how to fix it. In the screenshot below, Cloudpress states that the value must match the ID or title of an existing category in WordPress.
You can refer to the documentation for your CMS in the Integrations section of the documentation for more information.
