Introduction
Cloudpress allows you to set additional field values when exporting content to WordPress. This document gives you more information on the WordPress fields that Cloudpress support. Please refer to the Export additional fields to your CMS documentation for information on specifying the values when exporting from Google Docs and Notion.Standard fields
The tables below list the standard WordPress fields that Cloudpress currently supports. The Field name columns list the names of the fields. The Type column defines the type of value that Cloudpress expects for the field. The Supported In column indicates whether the field is supported in posts, pages, or both. The Description column gives more information about the purpose of the field and possible values.| Field name | Type | Supported In | Description |
|---|---|---|---|
| author | Text | Posts, Pages | The ID, username, name, or email of an existing user in WordPress. |
| categories | Text | Posts | The ID or name of an existing category in WordPress. If you specify a numeric value (e.g. 21), Cloudpress will try to find the category by its ID. If you specify a text value (e.g. China), Cloudpress will try to find the category by its name. You can specify multiple categories using a semicolon (;) as a delimiter, for example, China; Travel. |
| comment_status | Text | Posts, Pages | Specifies whether comments are allowed on the post. Possible values are open or true if comments are allowed, or closed or false when comments are not allowed. |
| date | Text | Posts, Pages | The date for the post. See the section below on date formats. |
| excerpt | Text | Posts, Pages | The excerpt for the post. |
| featured_image | Image | Posts, Pages | An image to serve as the featured image for the blog post. |
| ping_status | Text | Posts, Pages | Specifies whether pings and trackbacks are allowed on the post. Possible values are open or true if comments are allowed or closed or false when comments are not allowed. |
| slug | Text | Posts, Pages | The slug for the post. |
| status | Text | Posts, Pages | The status of the post/page. Possible values are publish, future, draft, pending, or private. |
| sticky | Text | Posts | Specifies whether the post should stick to the top of the blog. Possible values a true or false. |
| title | Text | Posts, Pages | The title of the post. By default, Cloudpress uses the title of the source document for the title, but you can override it by supplying a value for this field. |
| tags | Text | Posts | The ID or name of an existing tag in WordPress. If you specify a numeric value (e.g. 21), Cloudpress will try to find the tag by its ID. If you specify a text value (e.g. China), Cloudpress will try to find the tag by its name. You can specify multiple tags using a semicolon (;) as a delimiter, for example, China; Travel. |
Date formats
You can specify a date using just the date, the date with a time, or the date with a time and time zone specifier. The table below gives examples of each of these, along with an explanation.| Text value | Date | Explanation |
|---|---|---|
| 2023-02-27 | Midnight (GMT) on 27 February 2023 | The date format is YYYY-MM-DD. If no time is specified, the time will be assumed to be midnight GMT. |
| 2023-02-27T13:45 | 1:45 PM (GMT) on 27 February 2023 | Time can be specified by appending the T specifier to the date along with the time in HH:MM format. Time is specified using a 24-hour clock. |
| 2023-02-27T13:45-05:00 | 1:45 PM (Eastern Standard Time/EST) on 27 February 2023 | You can add a time zone offset by adding a + or - and the offset in HH:MM. For example, -05:00 indicates https://www.timeanddate.com/time/zones/est. As another example, if you want to specify the time in https://www.timeanddate.com/time/zones/ict, you can use +07:00. |
Custom fields
Cloudpress allows you to set custom fields, but since Cloudpress is, in most cases, unable to validate that the field names and values you supply are correct, it is up to you to ensure to specify the correct field names and values. Custom fields values also have the following requirements:- The custom fields must support updating via the WordPress REST API. Most custom field plugins support this, but you need to refer to their documentation.
- Since Cloudpress cannot determine the underlying field type, Cloudpress can only update text values. The underlying custom field value must support setting its as a text representation.
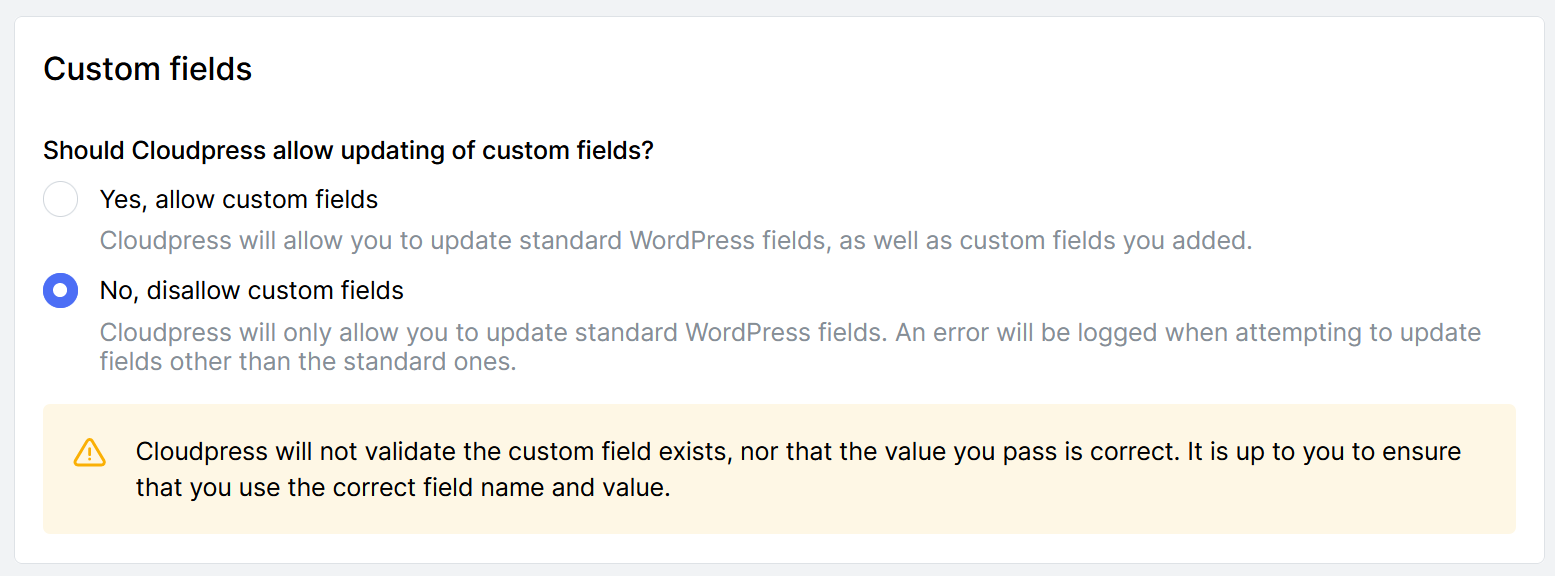 The field name you specify will depend on how custom fields require updating via the REST API. For example, for Advanced Custom Fields (ACF) plugin requires you to pass the custom fields inside an
 acf object when sending updates via the REST API.
To demonstrate this, suppose you add a custom field named country with the ACF plugin and want to update the value to “Thailand”. When updating this field, Cloudpress must send the following JSON update via the WordPress REST API:
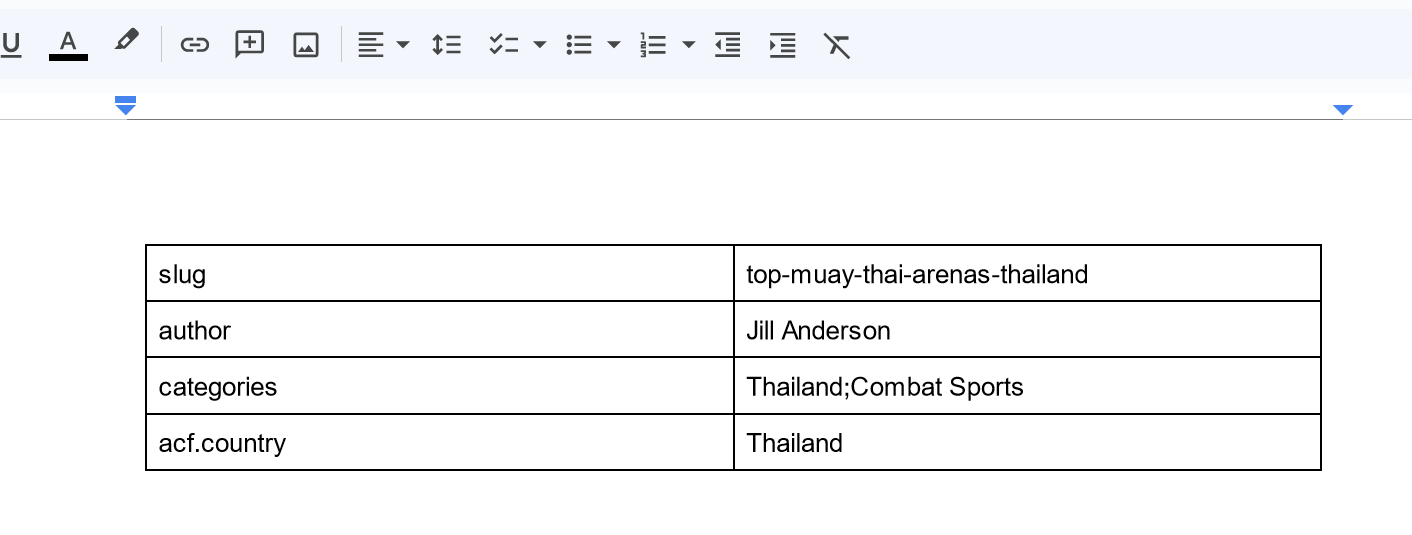
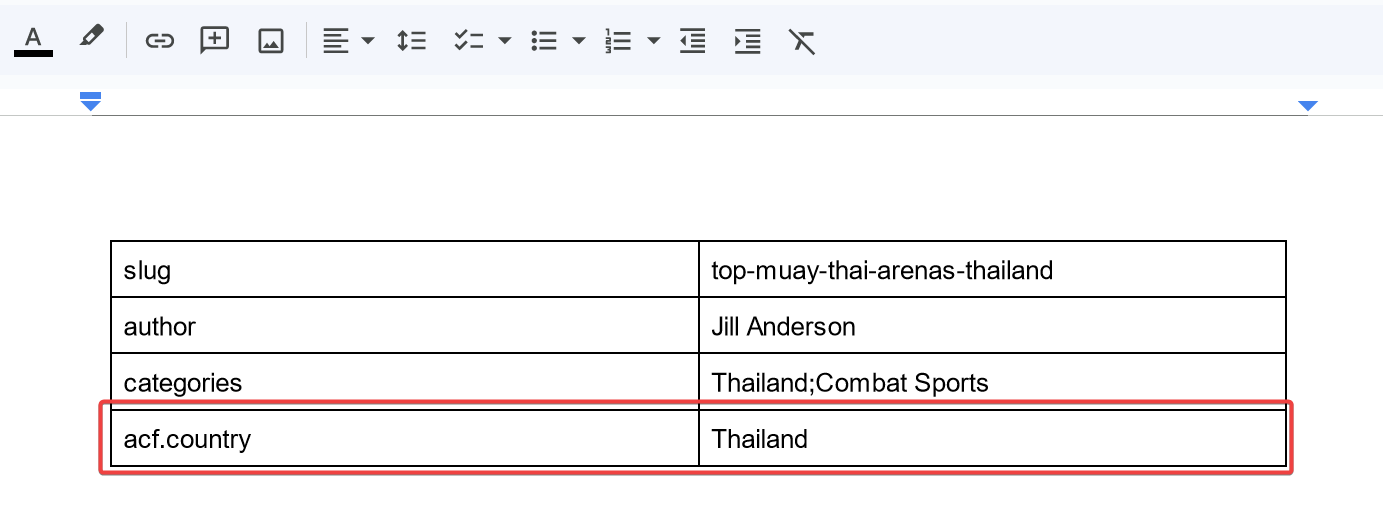
.) to separate the different parts of the nested structure. For example, to update the country field created by ACF as described above, you must specify the property name in the property table in Google Docs as [acf.country](http://acf.country), as per the screenshot below.
 Let’s look at how you can create and update custom fields using some of the most common custom fields plugins.
Using Cloudpress with Advanced Custom Fields (ACF)
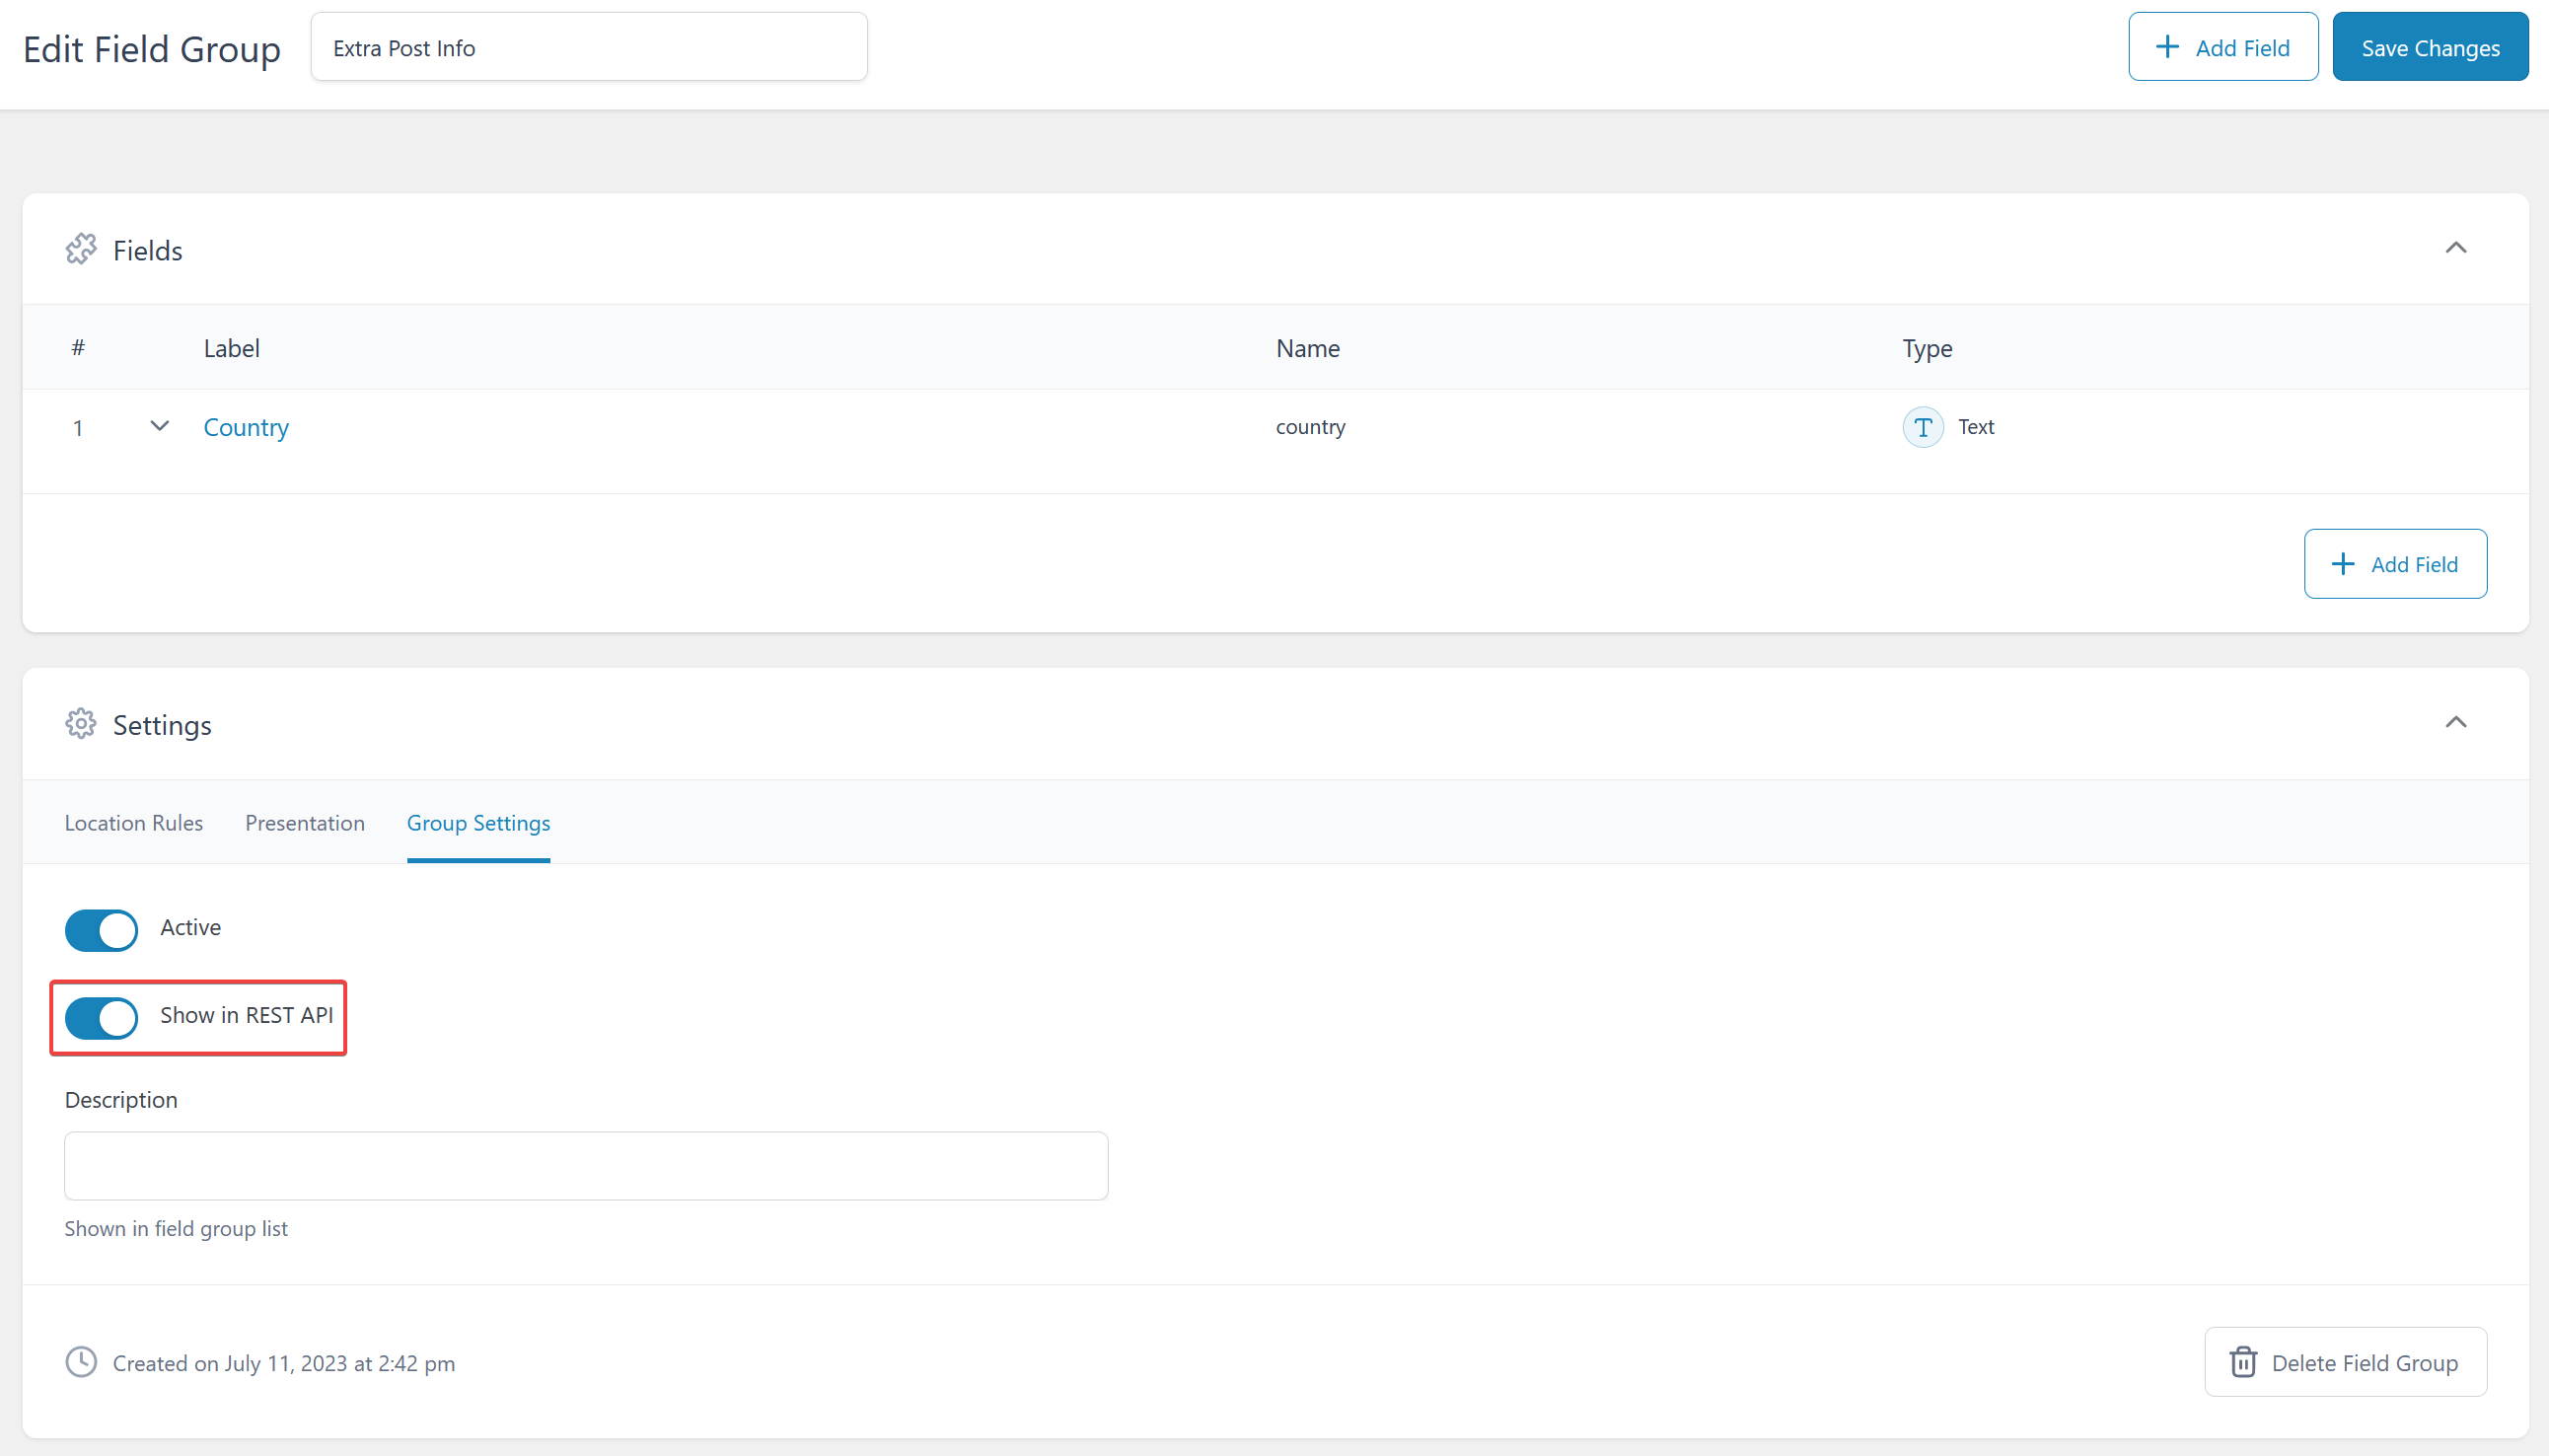
Add the Advanced Custom Fields (ACF) plugin to your WordPress site. Create a new field group and add a field with the field namecountry.
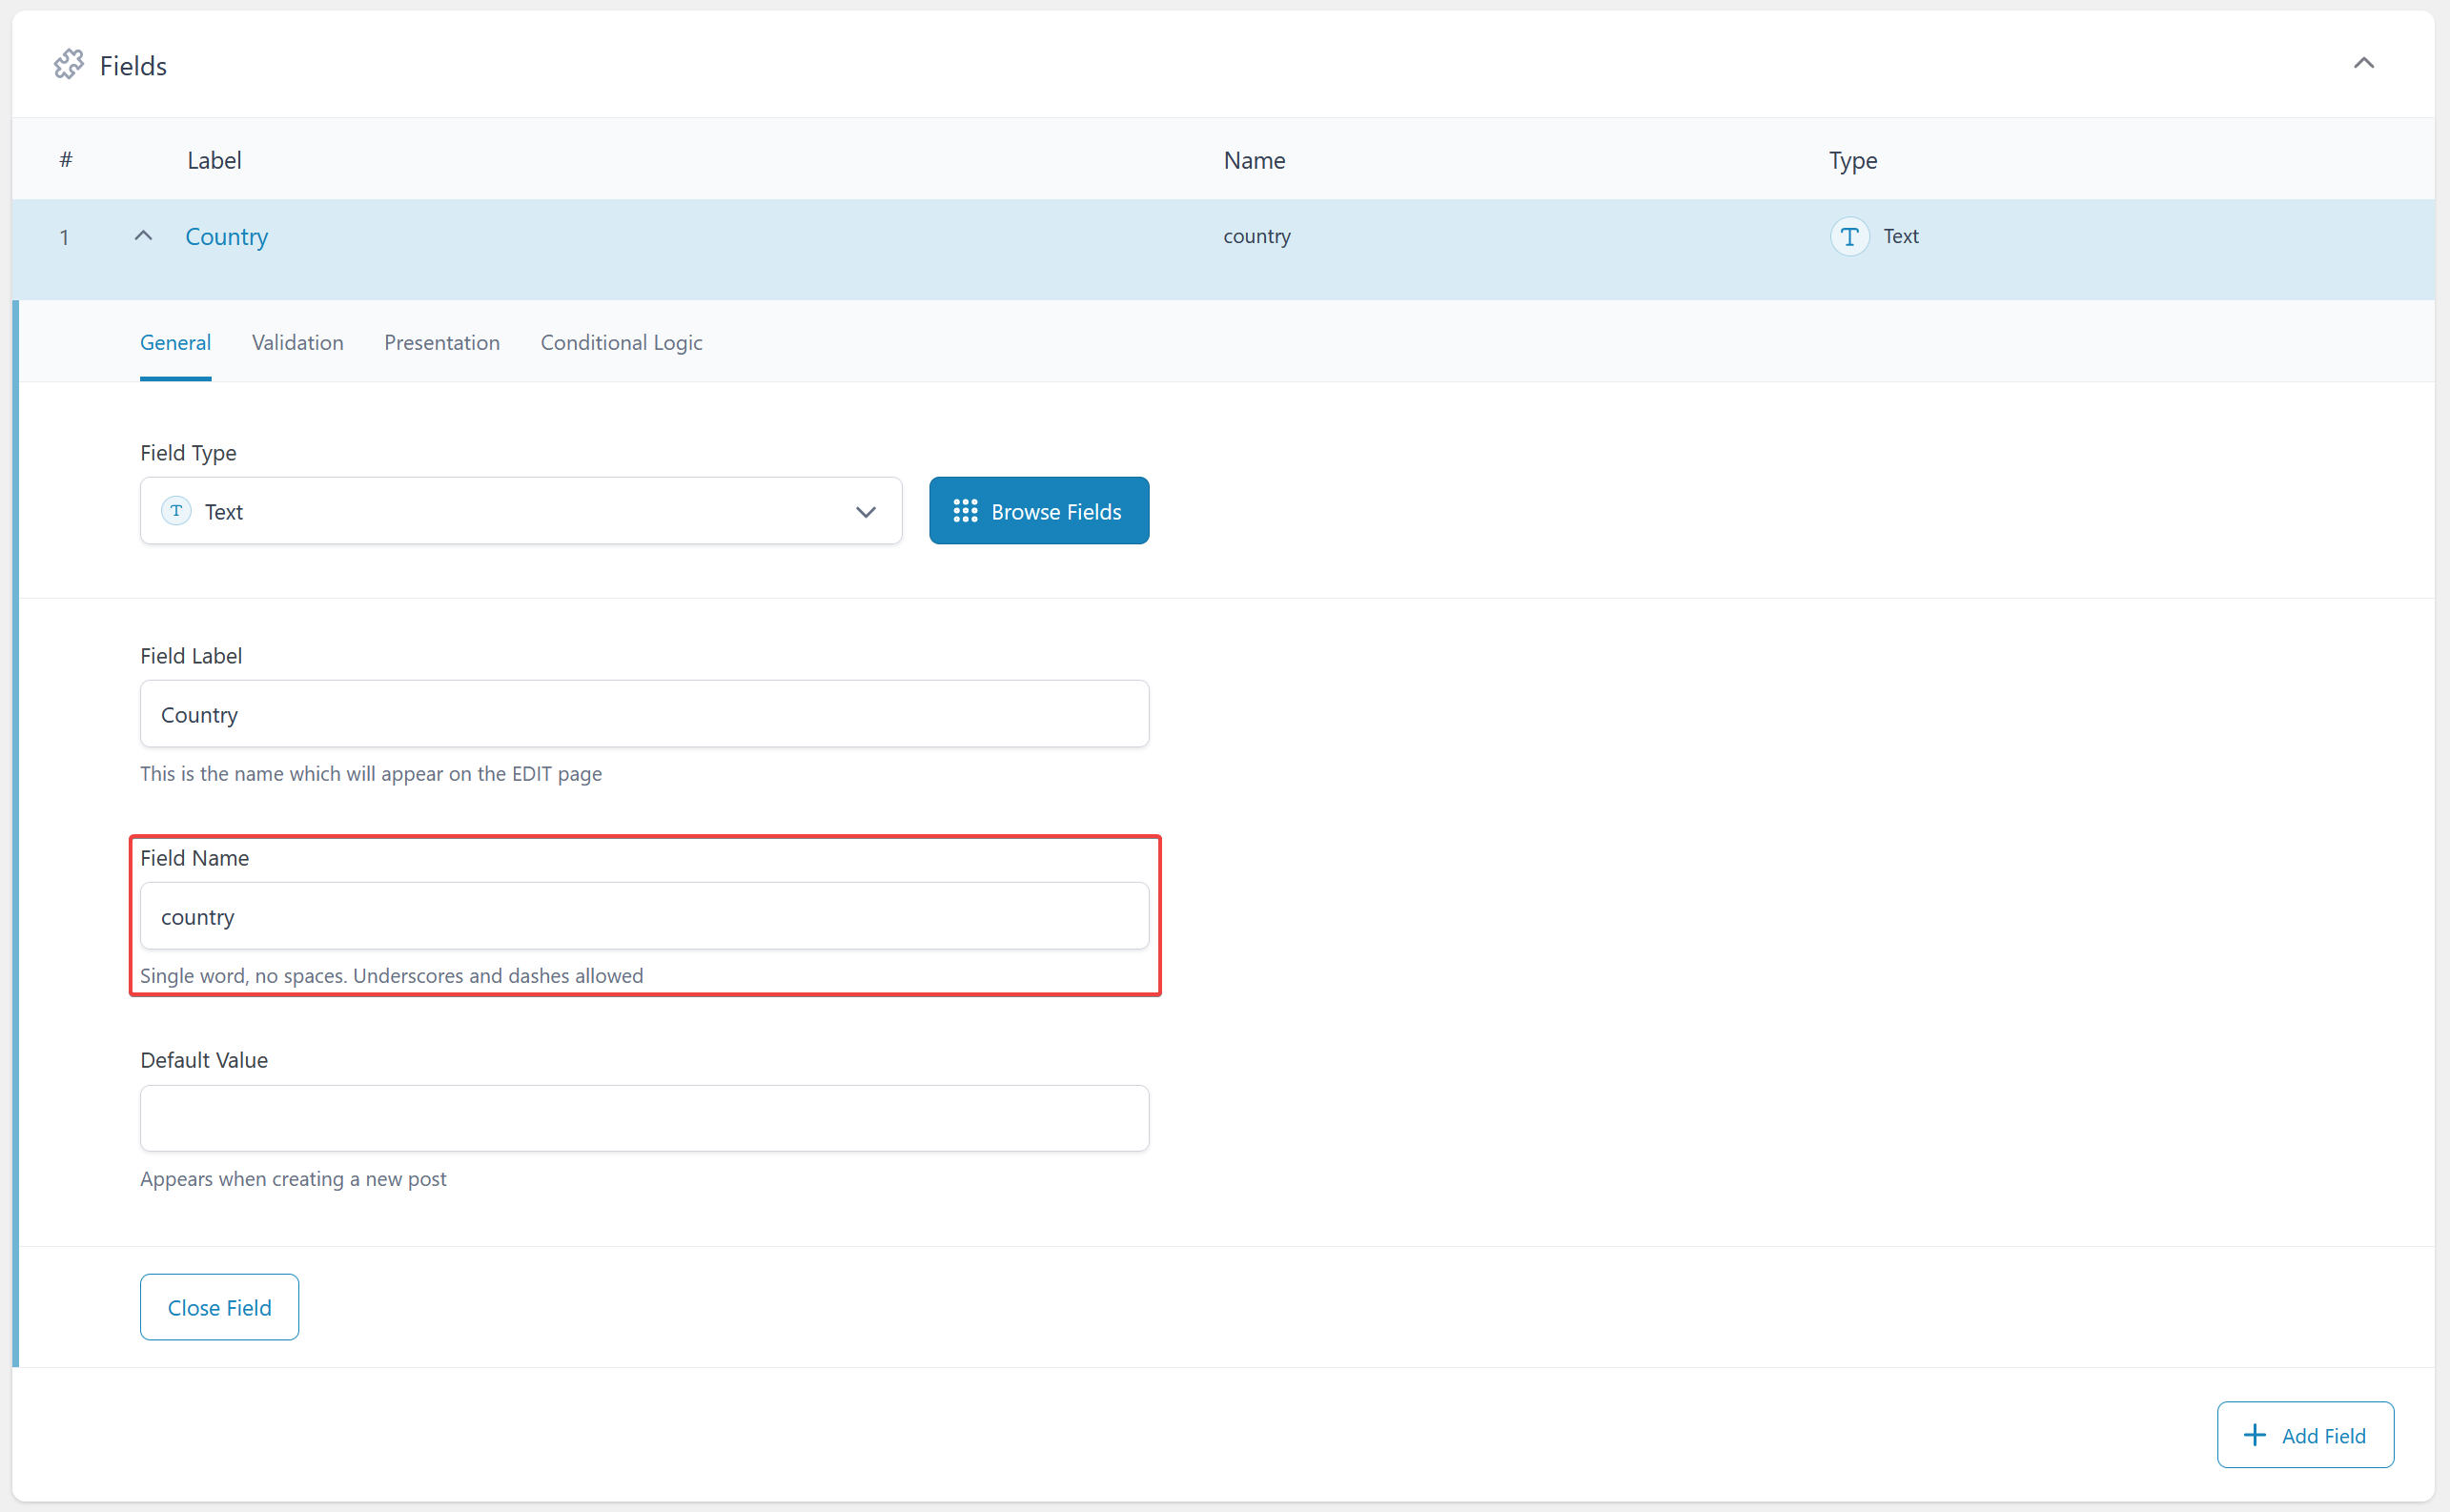 Scroll down to the group settings and make sure that you enable the “Show in REST API” toggle, then save your changes.
 To update custom fields created with ACF, you need to use
 acf.[field name] as the name of the field. For example, if you use a property table in Google Docs, you can update the country field created above by using the name [acf.country](http://acf.country) in the property table.
Using Cloudpress with Meta Box
Add both the Meta Box plugin and the MB Rest API plugin. The MB Rest API plugin exposes custom fields you create with the Meta Box plugin via the WordPress REST API, allowing Cloudpress to update those fields.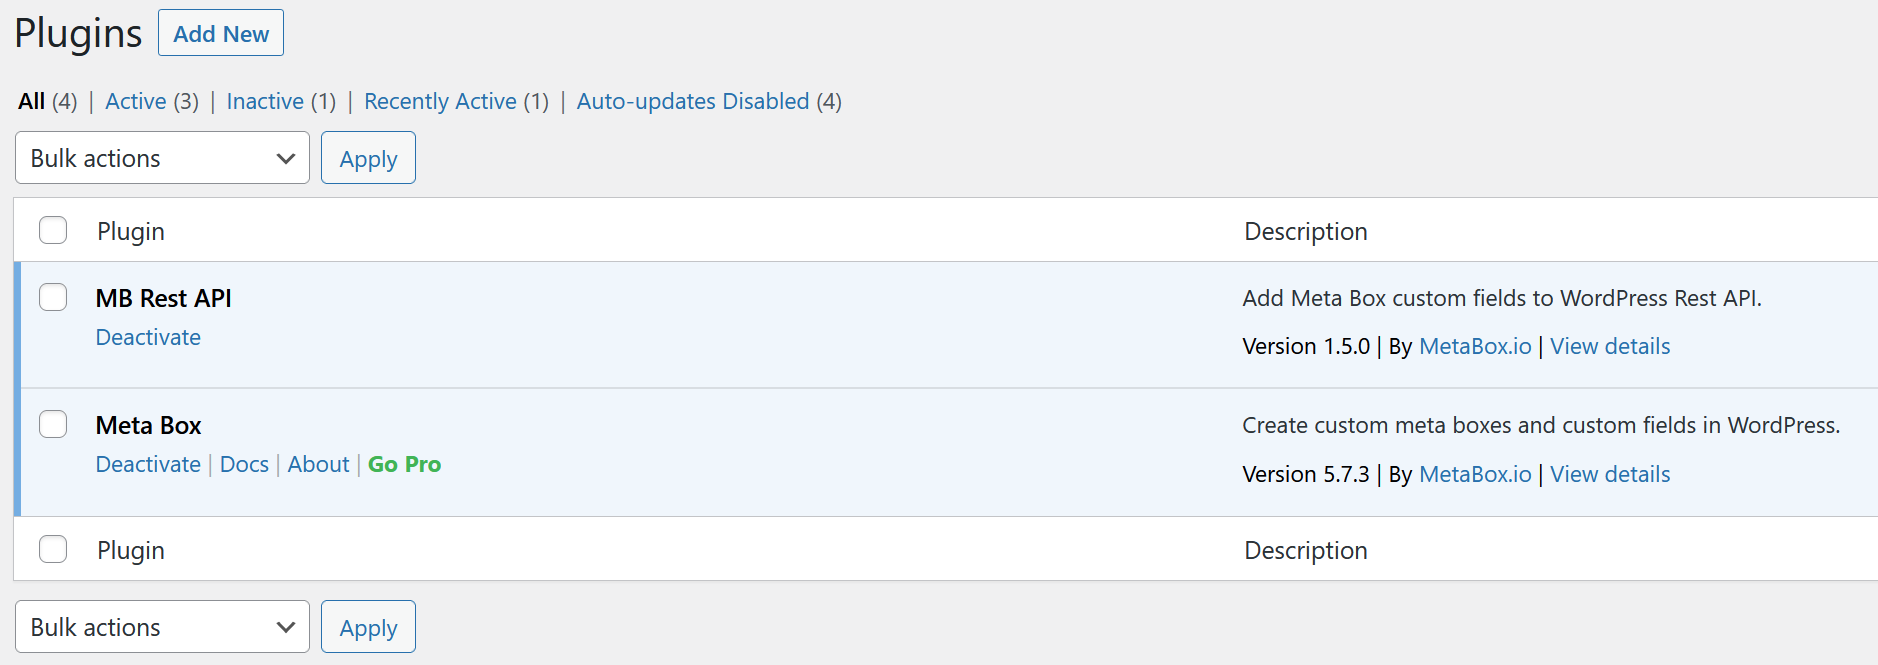 For this example, I will create a
 country custom field via code (as per their documentation):
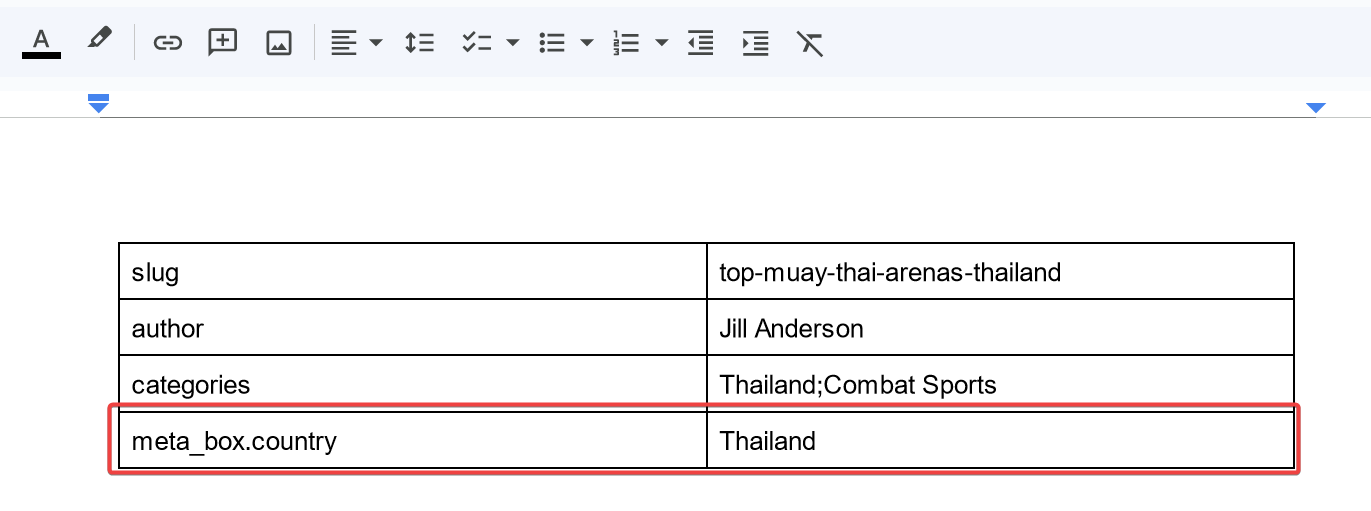
meta_box.[field id] as the name of the field. For example, if you use a property table in Google Docs, you can update the country field created above by using the name [meta_box.country](http://acf.country) in the property table.
