Introduction
Contentful Rich Text fields use a JSON format called Rich Text, a proprietary format developed by Contentful. When you export content to a Contentful Rich Text field, Cloudpress will automatically convert the content to the correct rich text format. It will convert your text with the formatting, headings, tables, code blocks, etc. However, you may want to export custom content not supported by Cloudpress. For example, Contentful rich text fields allow you to embed other Contentful entries and assets via the Embed menu in the rich text editor. Since neither Google Docs nor Notion has any concept of embedded entries and assets, there is no way for you to include these in your source Google Docs and Notion pages.
You can edit the Contentful entry after you exported it with Cloudpress to add these elements, but that requires an extra step. Also, if you re-export the source content with Cloudpress, all your changes will be lost.
To work around this problem, Cloudpress introduced a feature called Raw Content Blocks that allows you to add custom rich text items like these. When Cloudpress exports your content and encounters a Raw Content Block, it will send the content of that block to Contentful as-is.
The rest of this document will walk you through this feature by demonstrating how to add an embedded entry and asset to your content.
Since neither Google Docs nor Notion has any concept of embedded entries and assets, there is no way for you to include these in your source Google Docs and Notion pages.
You can edit the Contentful entry after you exported it with Cloudpress to add these elements, but that requires an extra step. Also, if you re-export the source content with Cloudpress, all your changes will be lost.
To work around this problem, Cloudpress introduced a feature called Raw Content Blocks that allows you to add custom rich text items like these. When Cloudpress exports your content and encounters a Raw Content Block, it will send the content of that block to Contentful as-is.
The rest of this document will walk you through this feature by demonstrating how to add an embedded entry and asset to your content.
Get the JSON representation of your Rich Text element(s)
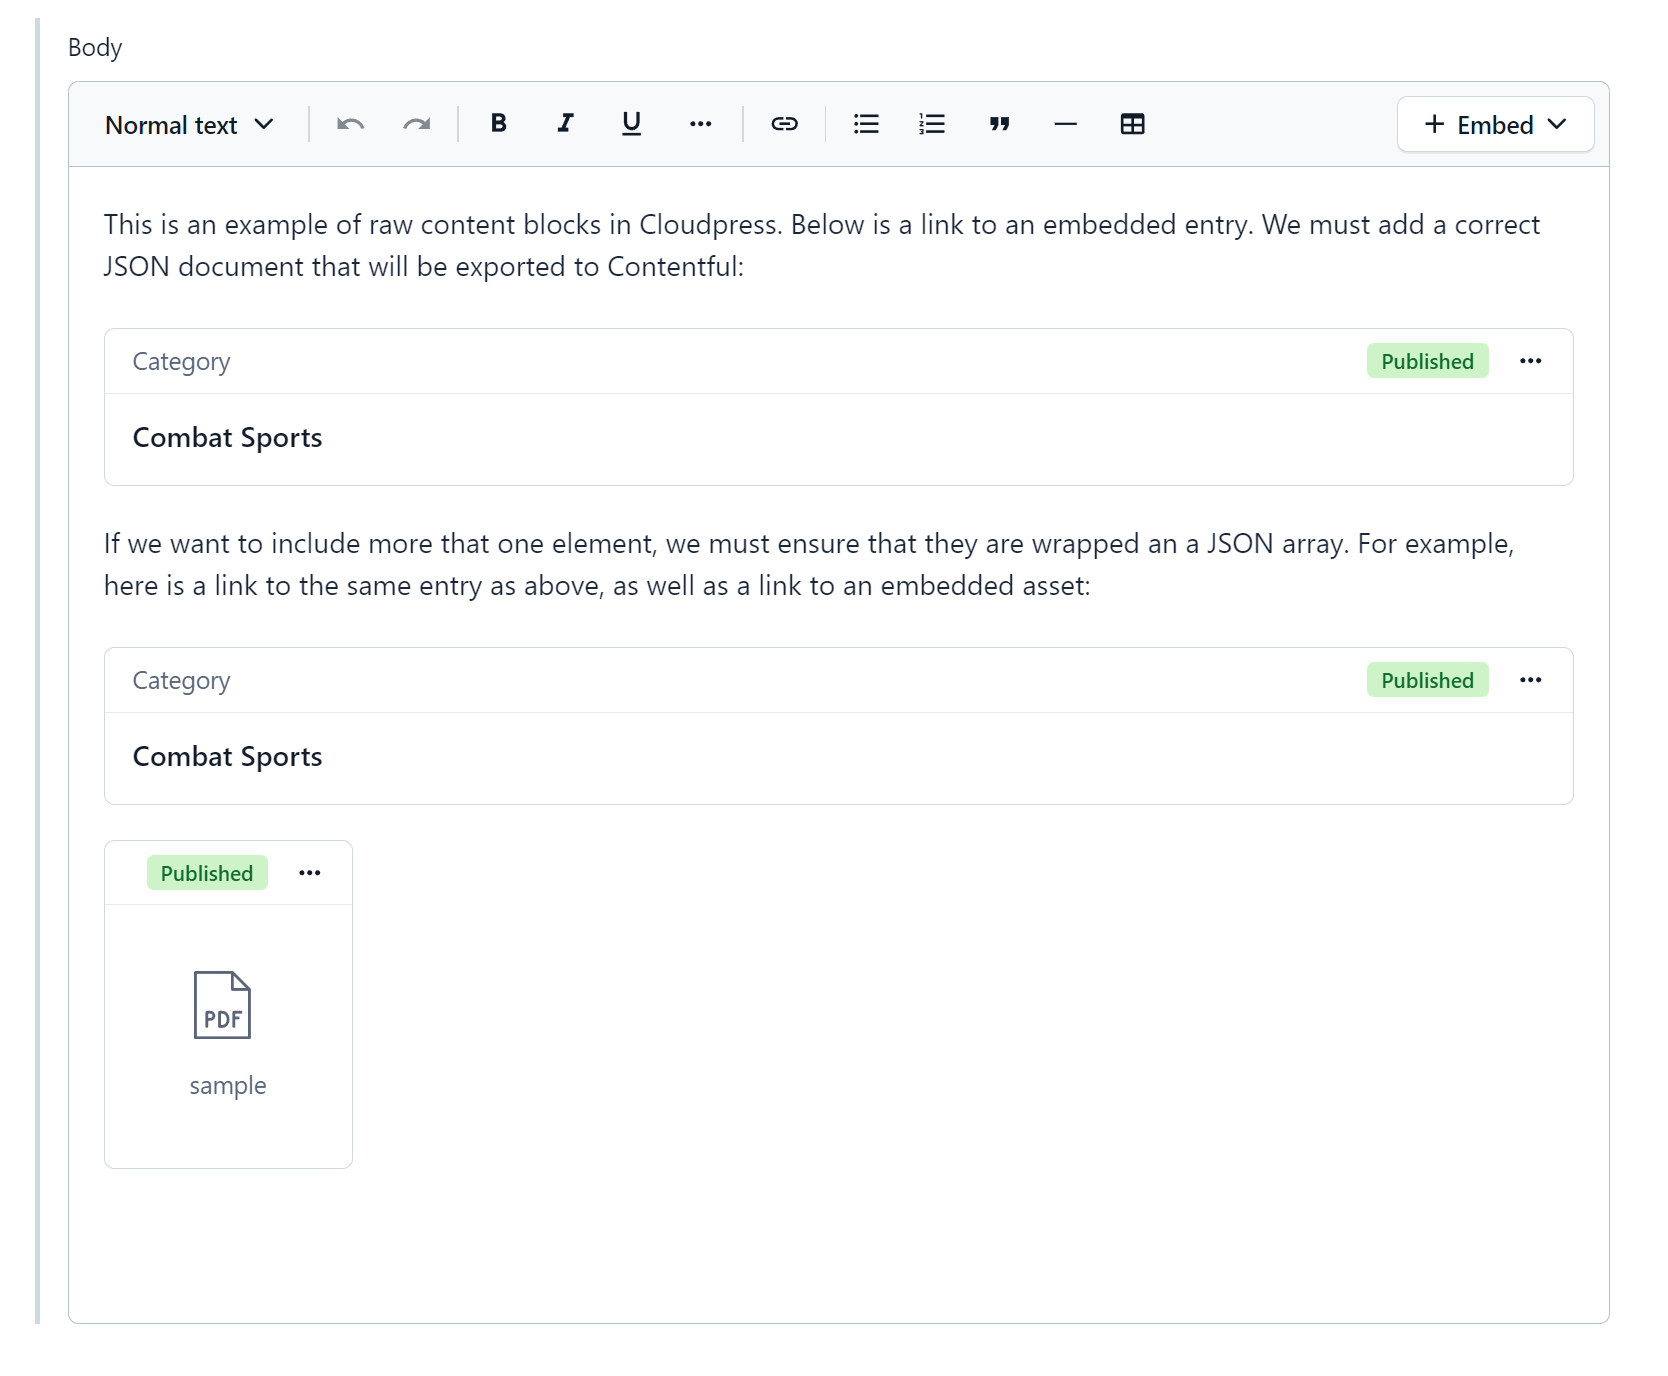
First, you must get the JSON representation of the Rich Text elements(s) you want to export. You must install the JSON viewer application from the Contentful Marketplace to assist you. After installing and configuring this application, a JSON Viewer tab will be available when editing an entry in Contentful. Let’s create a sample entry in Contentful containing the rich text elements we want to export. We created a document containing an embedded entry and an embedded asset for demonstration purposes.
 You can view the JSON for these elements by switching to the JSON Viewer tab.
Let’s look at the structure of the JSON document and how we can locate the JSON representation of these rich text elements.
You can view the JSON for these elements by switching to the JSON Viewer tab.
Let’s look at the structure of the JSON document and how we can locate the JSON representation of these rich text elements.

- The
fieldsproperty contains all the fields for the entry. - The
bodyproperty contains the value of thebodyfield we are interested in. - The
en-USproperty contains the value of thebodyfield for theen-USlanguage. You may see a different value (or multiple values) depending on your locale(s). - Finally, the
contentproperty is an array that contains all the rich text elements. Each element will have an index, e.g.0,1, etc.
 For example, here is the JSON of the embedded entry block:
Export your custom Rich Text
To export the Rich Text elements, you must define a raw content block using the@@begin_raw_content and @@end_raw_content processing directives.
- Denote the start of a raw content block by by adding the
@@begin_raw_contentdirective to your document. - After that, add the JSON for the Rich Text element(s)
- Finally, close off a raw content block, use the
@@end_raw_contentdirective.
- Using Google Docs
- Using Notion


@@begin_raw_content and @@end_raw_content directives as raw content and will export it to Contentful as-is. It is therefore important that the content you specify is valid JSON. If not, Contentful will prevent Cloudpress from exporting the content.
When the document in the screenshots above is exported to Contentful, it will result in the correct Rich Text content being created.