Introduction
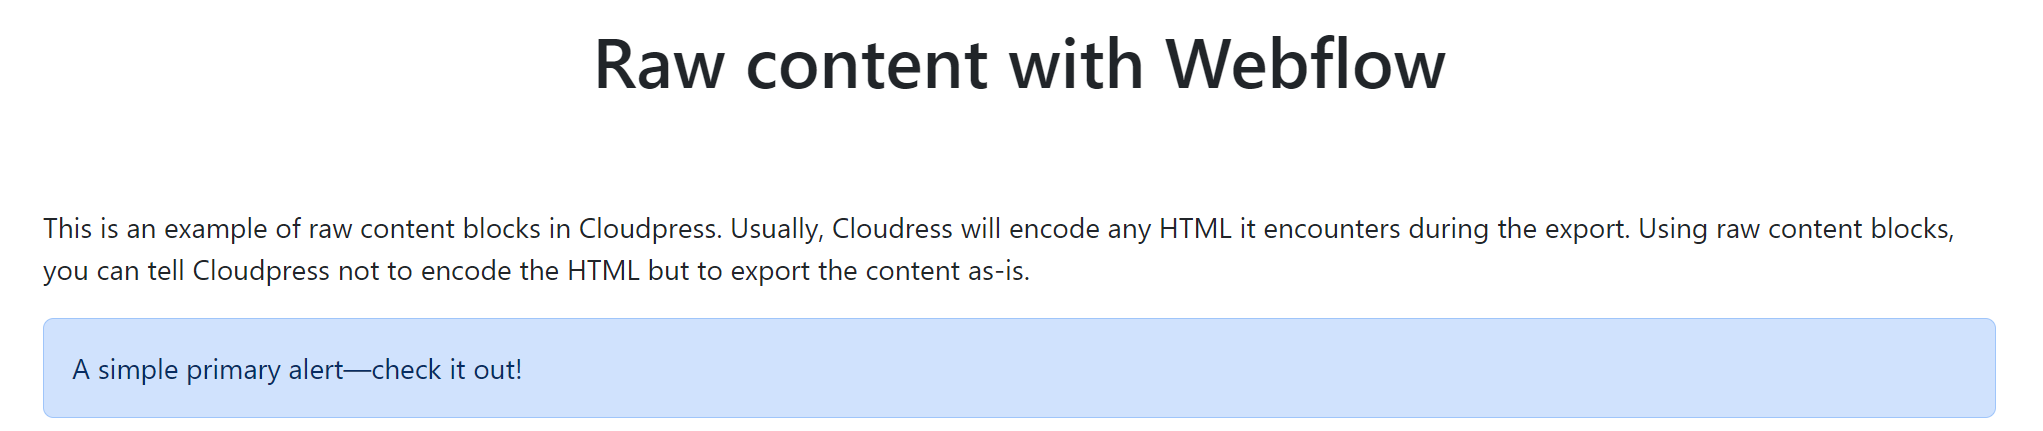
When Cloudpress exports content to Webflow, it converts it to HTML. This works for most scenarios, but sometimes, you want to export custom HTML. For example, you may want to add custom HTML for a call to action at a certain point in your content, Your first inclination may be to add the HTML to your source document and allow Cloudpress to export it to Webflow. However, this may not work as expected, as Cloudpress will encode the HTML when it exports the content. Let’s say you add the following HTML for a Bootstrap alert to your source document: When you export this to Webflow and publish the content, you will notice that it displays the raw HTML on the page, instead of displaying the Bootstrap alert.
 To work around this problem, Cloudpress introduced a feature called Raw Content Blocks. When Cloudpress exports your content and encounters a Raw Content Block, it will send the content of that block to Webflow as-is.
The rest of this document will walk you through this feature by demonstrating how to use Raw Content Blocks in Google Docs and Notion to correctly export the HTML from the sample above.
To work around this problem, Cloudpress introduced a feature called Raw Content Blocks. When Cloudpress exports your content and encounters a Raw Content Block, it will send the content of that block to Webflow as-is.
The rest of this document will walk you through this feature by demonstrating how to use Raw Content Blocks in Google Docs and Notion to correctly export the HTML from the sample above.
Export your custom HTML
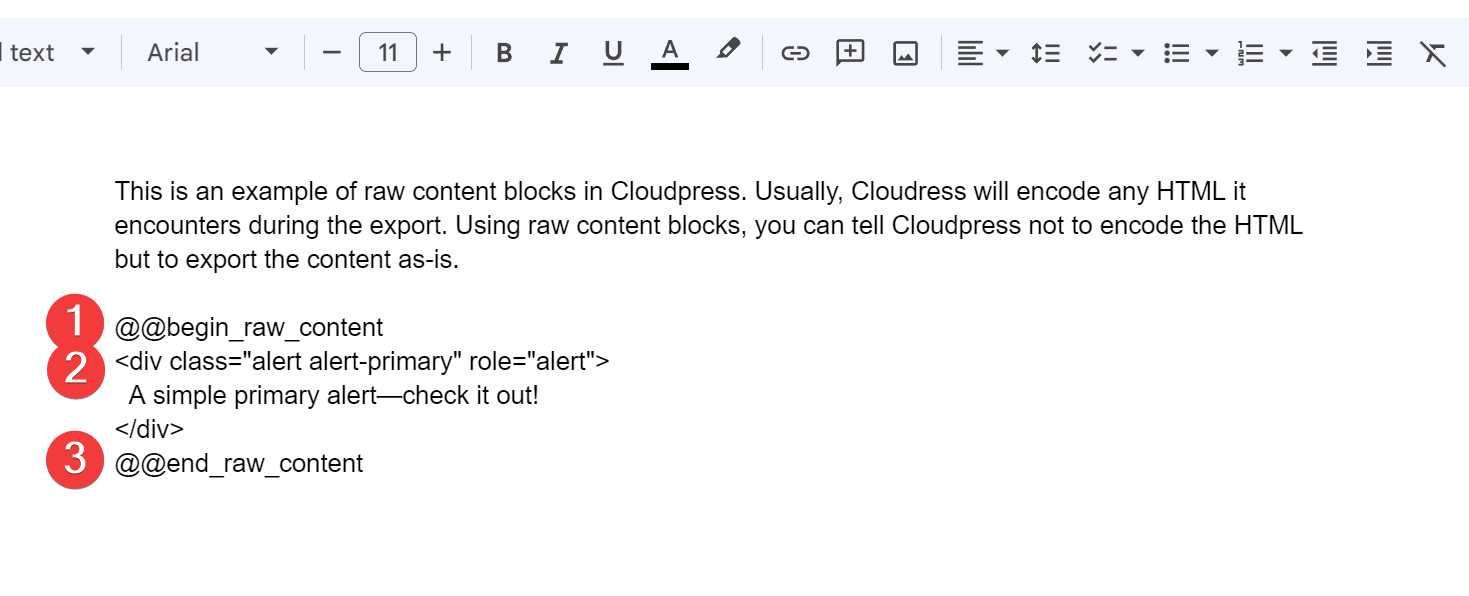
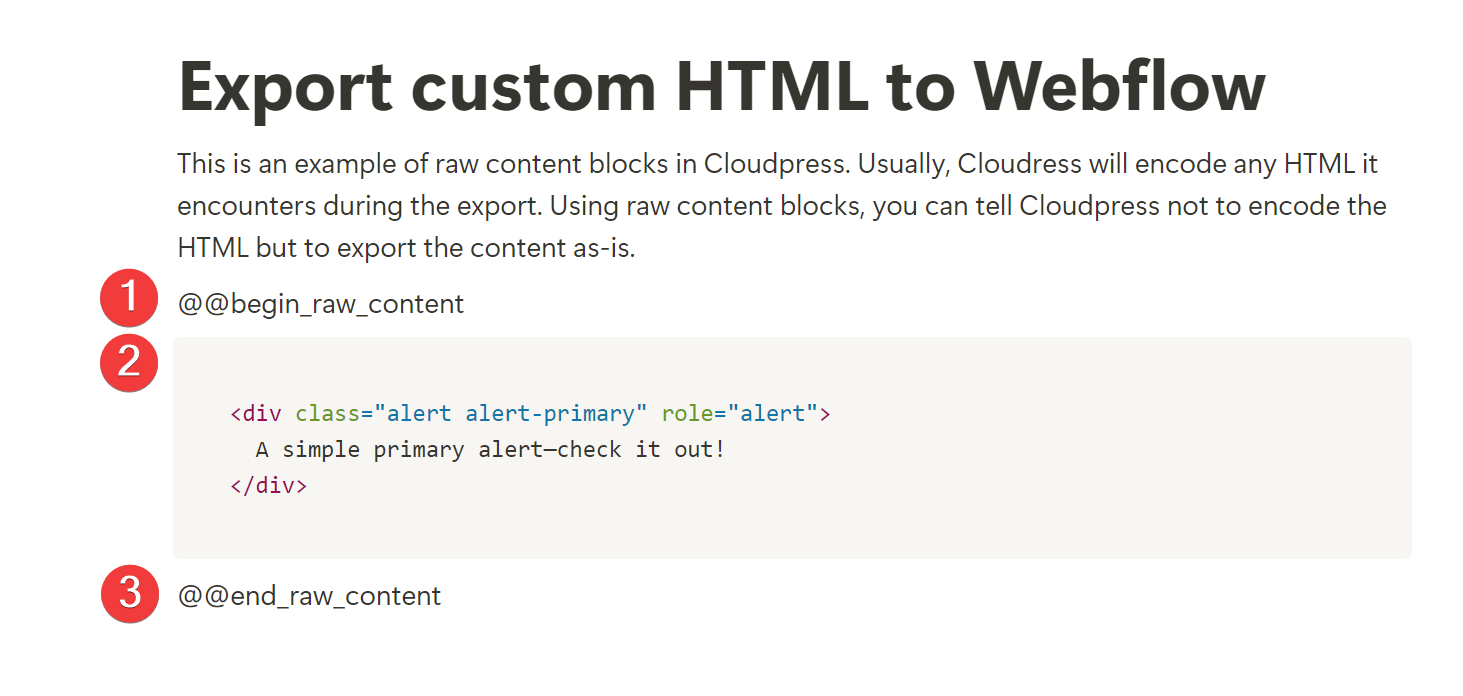
To export the custom HTML, you must define a raw content block using the@@begin_raw_content and @@end_raw_content processing directives.
- Denote the start of a raw content block by by adding the
@@begin_raw_contentdirective to your document. - After that, add your custom HTML
- Finally, close off a raw content block, use the
@@end_raw_contentdirective.
- Using Google Docs
- Using Notion
@@begin_raw_content and @@end_raw_content directives as raw content and will export it to Webflow as custom code.
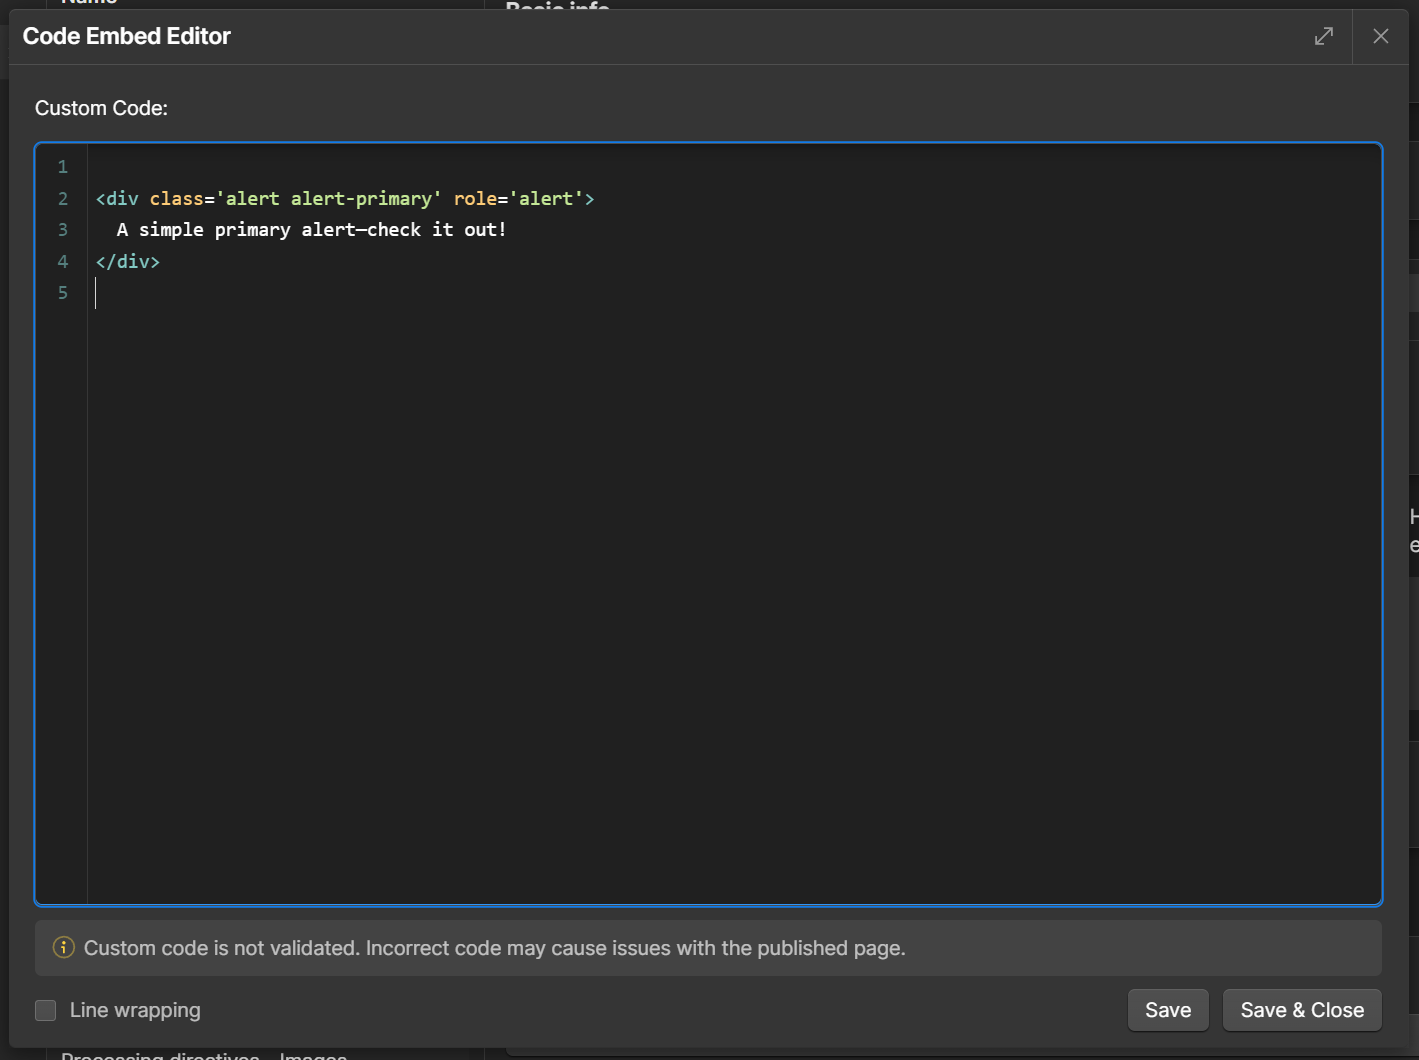
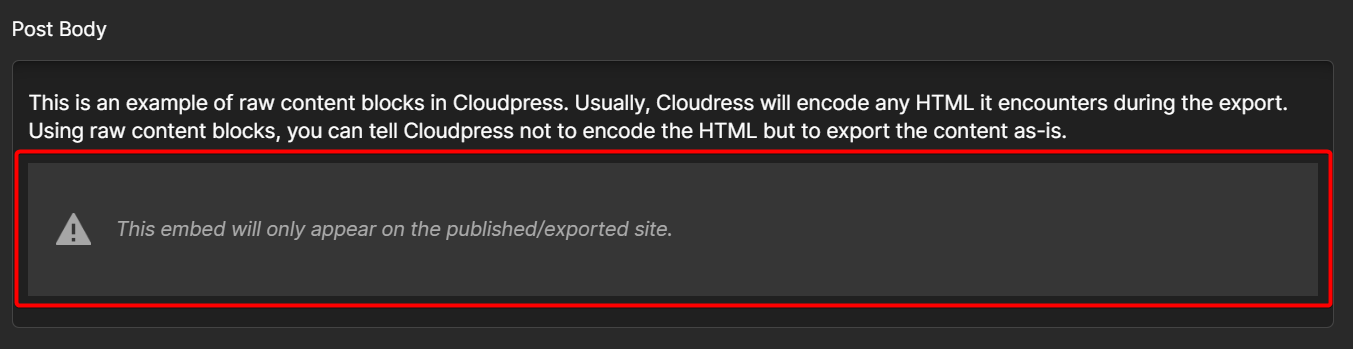 If you open the Code Embed Editor, your will see the HTML that Cloudpress exported.
 Finally, if you publish your website, the Bootstrap alert will display correctly.