Introduction
When you export content to WordPress, Cloudpress will automatically convert the content to the correct Gutenberg blocks. It will convert your text with the formatting, your headings, tables, code blocks, etc. Sometimes, however, you may want to include a custom Gutenberg block in the content exported by Cloudpress. For example, you may want to insert an email sign-up form, call to action, or countdown timer block. Neither Google Docs nor Notion has the concept of a countdown timer, for example, so you cannot add this to your source document in Google Docs or Notion. To work around this problem, Cloudpress introduced a feature called Raw Content Blocks that allows you to add custom Gutenberg code. When Cloudpress exports your content and encounters a raw content block, it will send the content of that block to WordPress as-is. The rest of this document will walk you through this feature by demonstrating how to add the Countdown block from Spectra blocks to your content.Get the source code for your custom Gutenberg block
The first thing you need to do is to get the source code for your custom Gutenberg block. The easiest way is to create an empty post and add the block. After configuring your Gutenberg block block to your desire, you can view the post’s source code by switching to the code editor.
 Highlight the code for the Gutenberg block you want to export. Ensure you highlight all the code for the block and copy it to your clipboard.
 Next, you will need to add this content to your document. The process is different depending on whether you use Google Docs or Notion.
Export your custom Gutenberg block
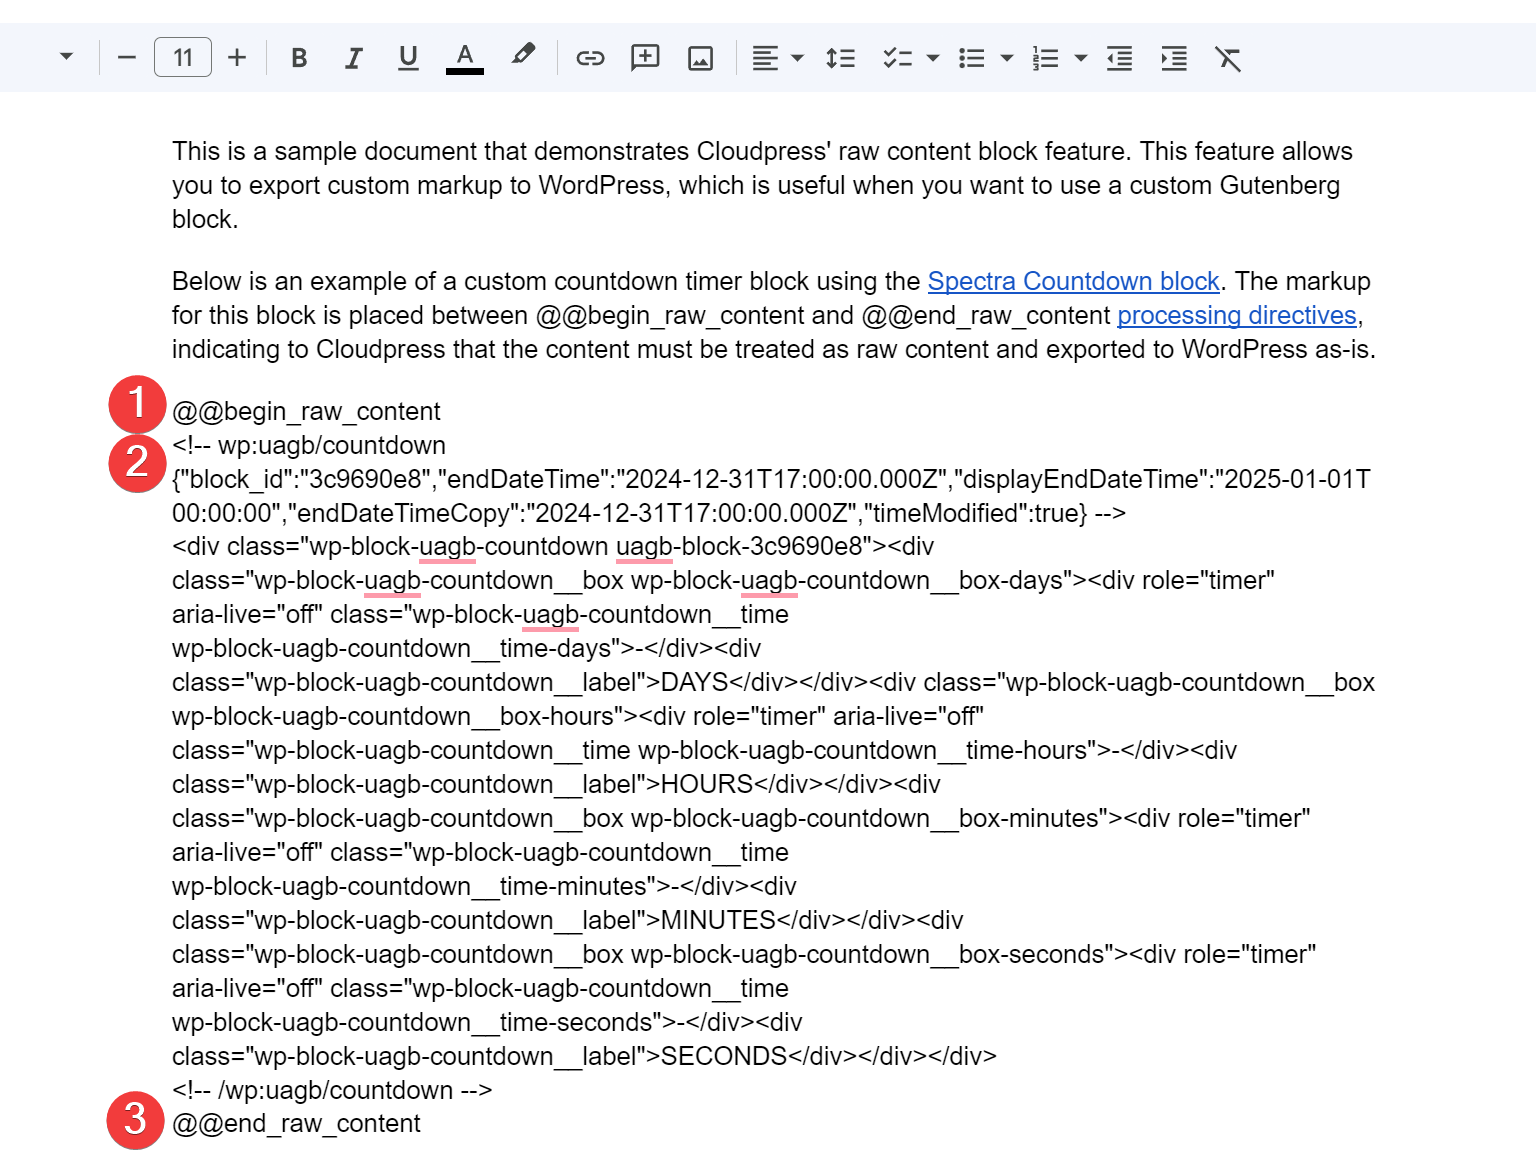
To export the custom Gutenberg block, you must define a raw content block using the@@begin_raw_content and @@end_raw_content processing directives.
- Denote the start of a raw content block by by adding the
@@begin_raw_contentdirective to your document. - After that, add the code for the Gutenberg block which you just copied from WordPress.
- Finally, close off a raw content block, use the
@@end_raw_contentdirective.
- Using Google Docs
- Using Notion
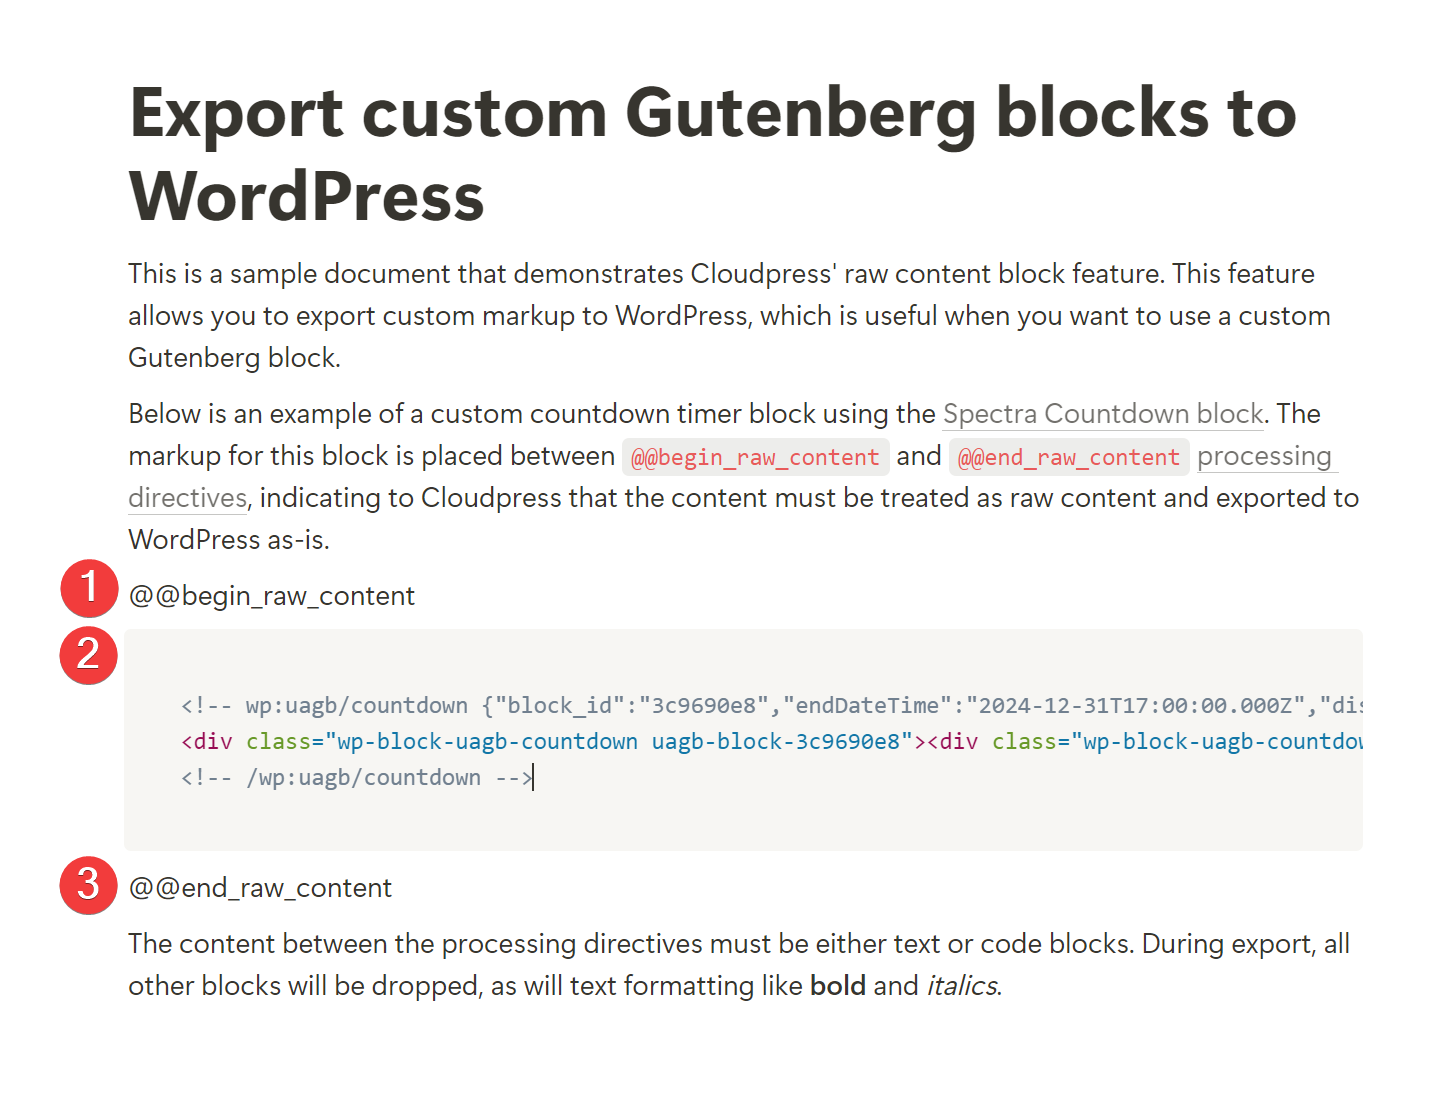
@@begin_raw_content and @@end_raw_content directives as raw content and will export it to WordPress as-is. It is therefore important that the content you specify is a valid Gutenberg block. If not, it may break your blog post in WordPress.
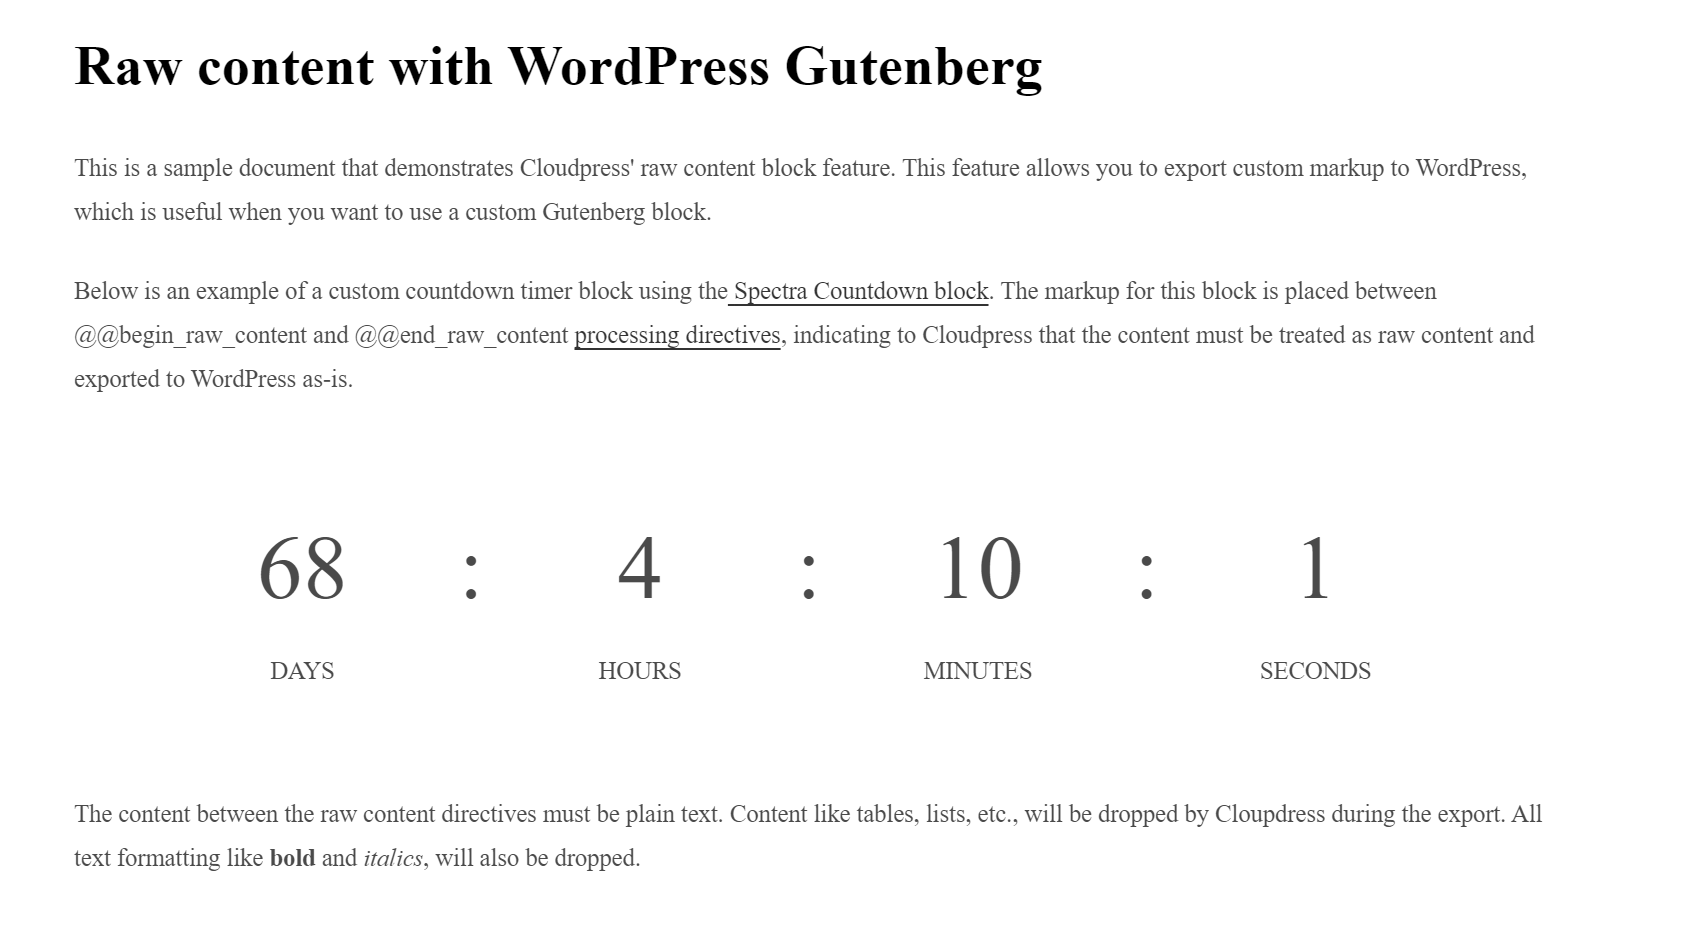
When the document in the screenshots above is exported to WordPress, it will result in the correct Gutenberg block being created.